The basement bathroom needed a makeover but I wanted to keep it within budget and also wanted to try to avoid demo if possible. This is a bathroom that hardly gets used so I didn’t want to put a ton of money, time and energy into it, but also wanted to make it pretty, more current and give it life. After doing some research I stumbled across a micro cement product that I thought would be a great option for what I was looking to achieve.
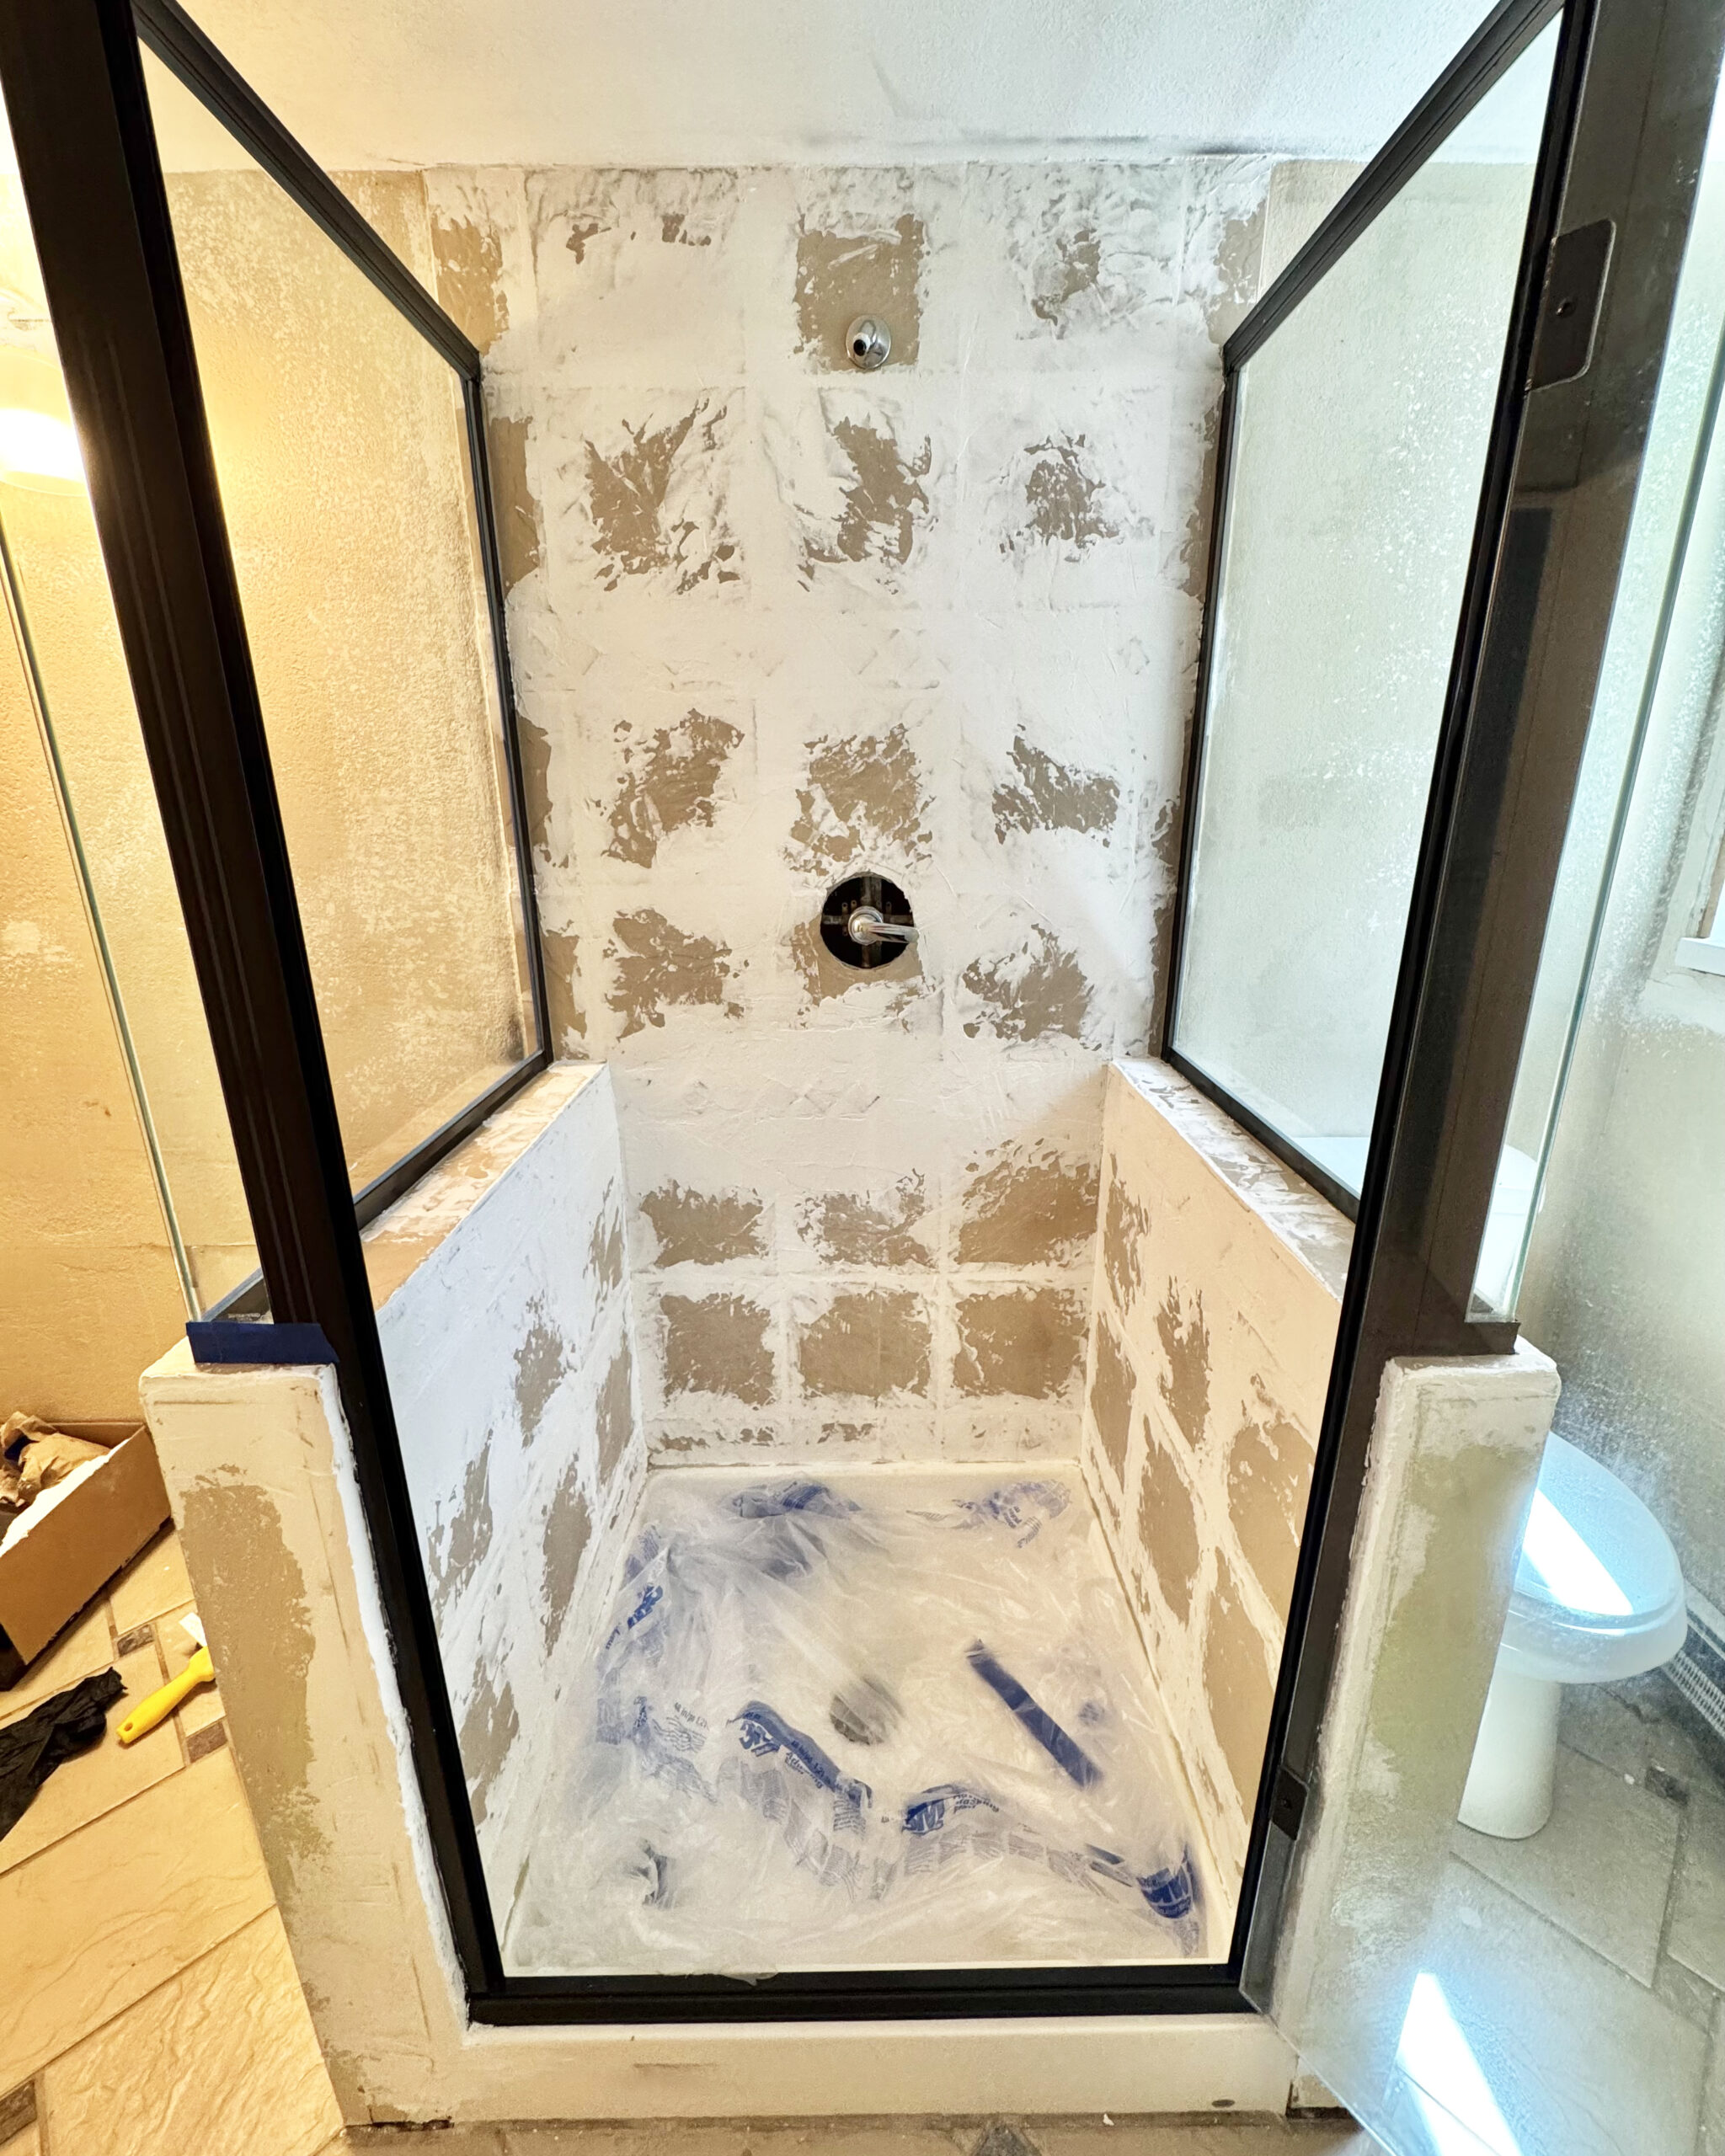
The Before
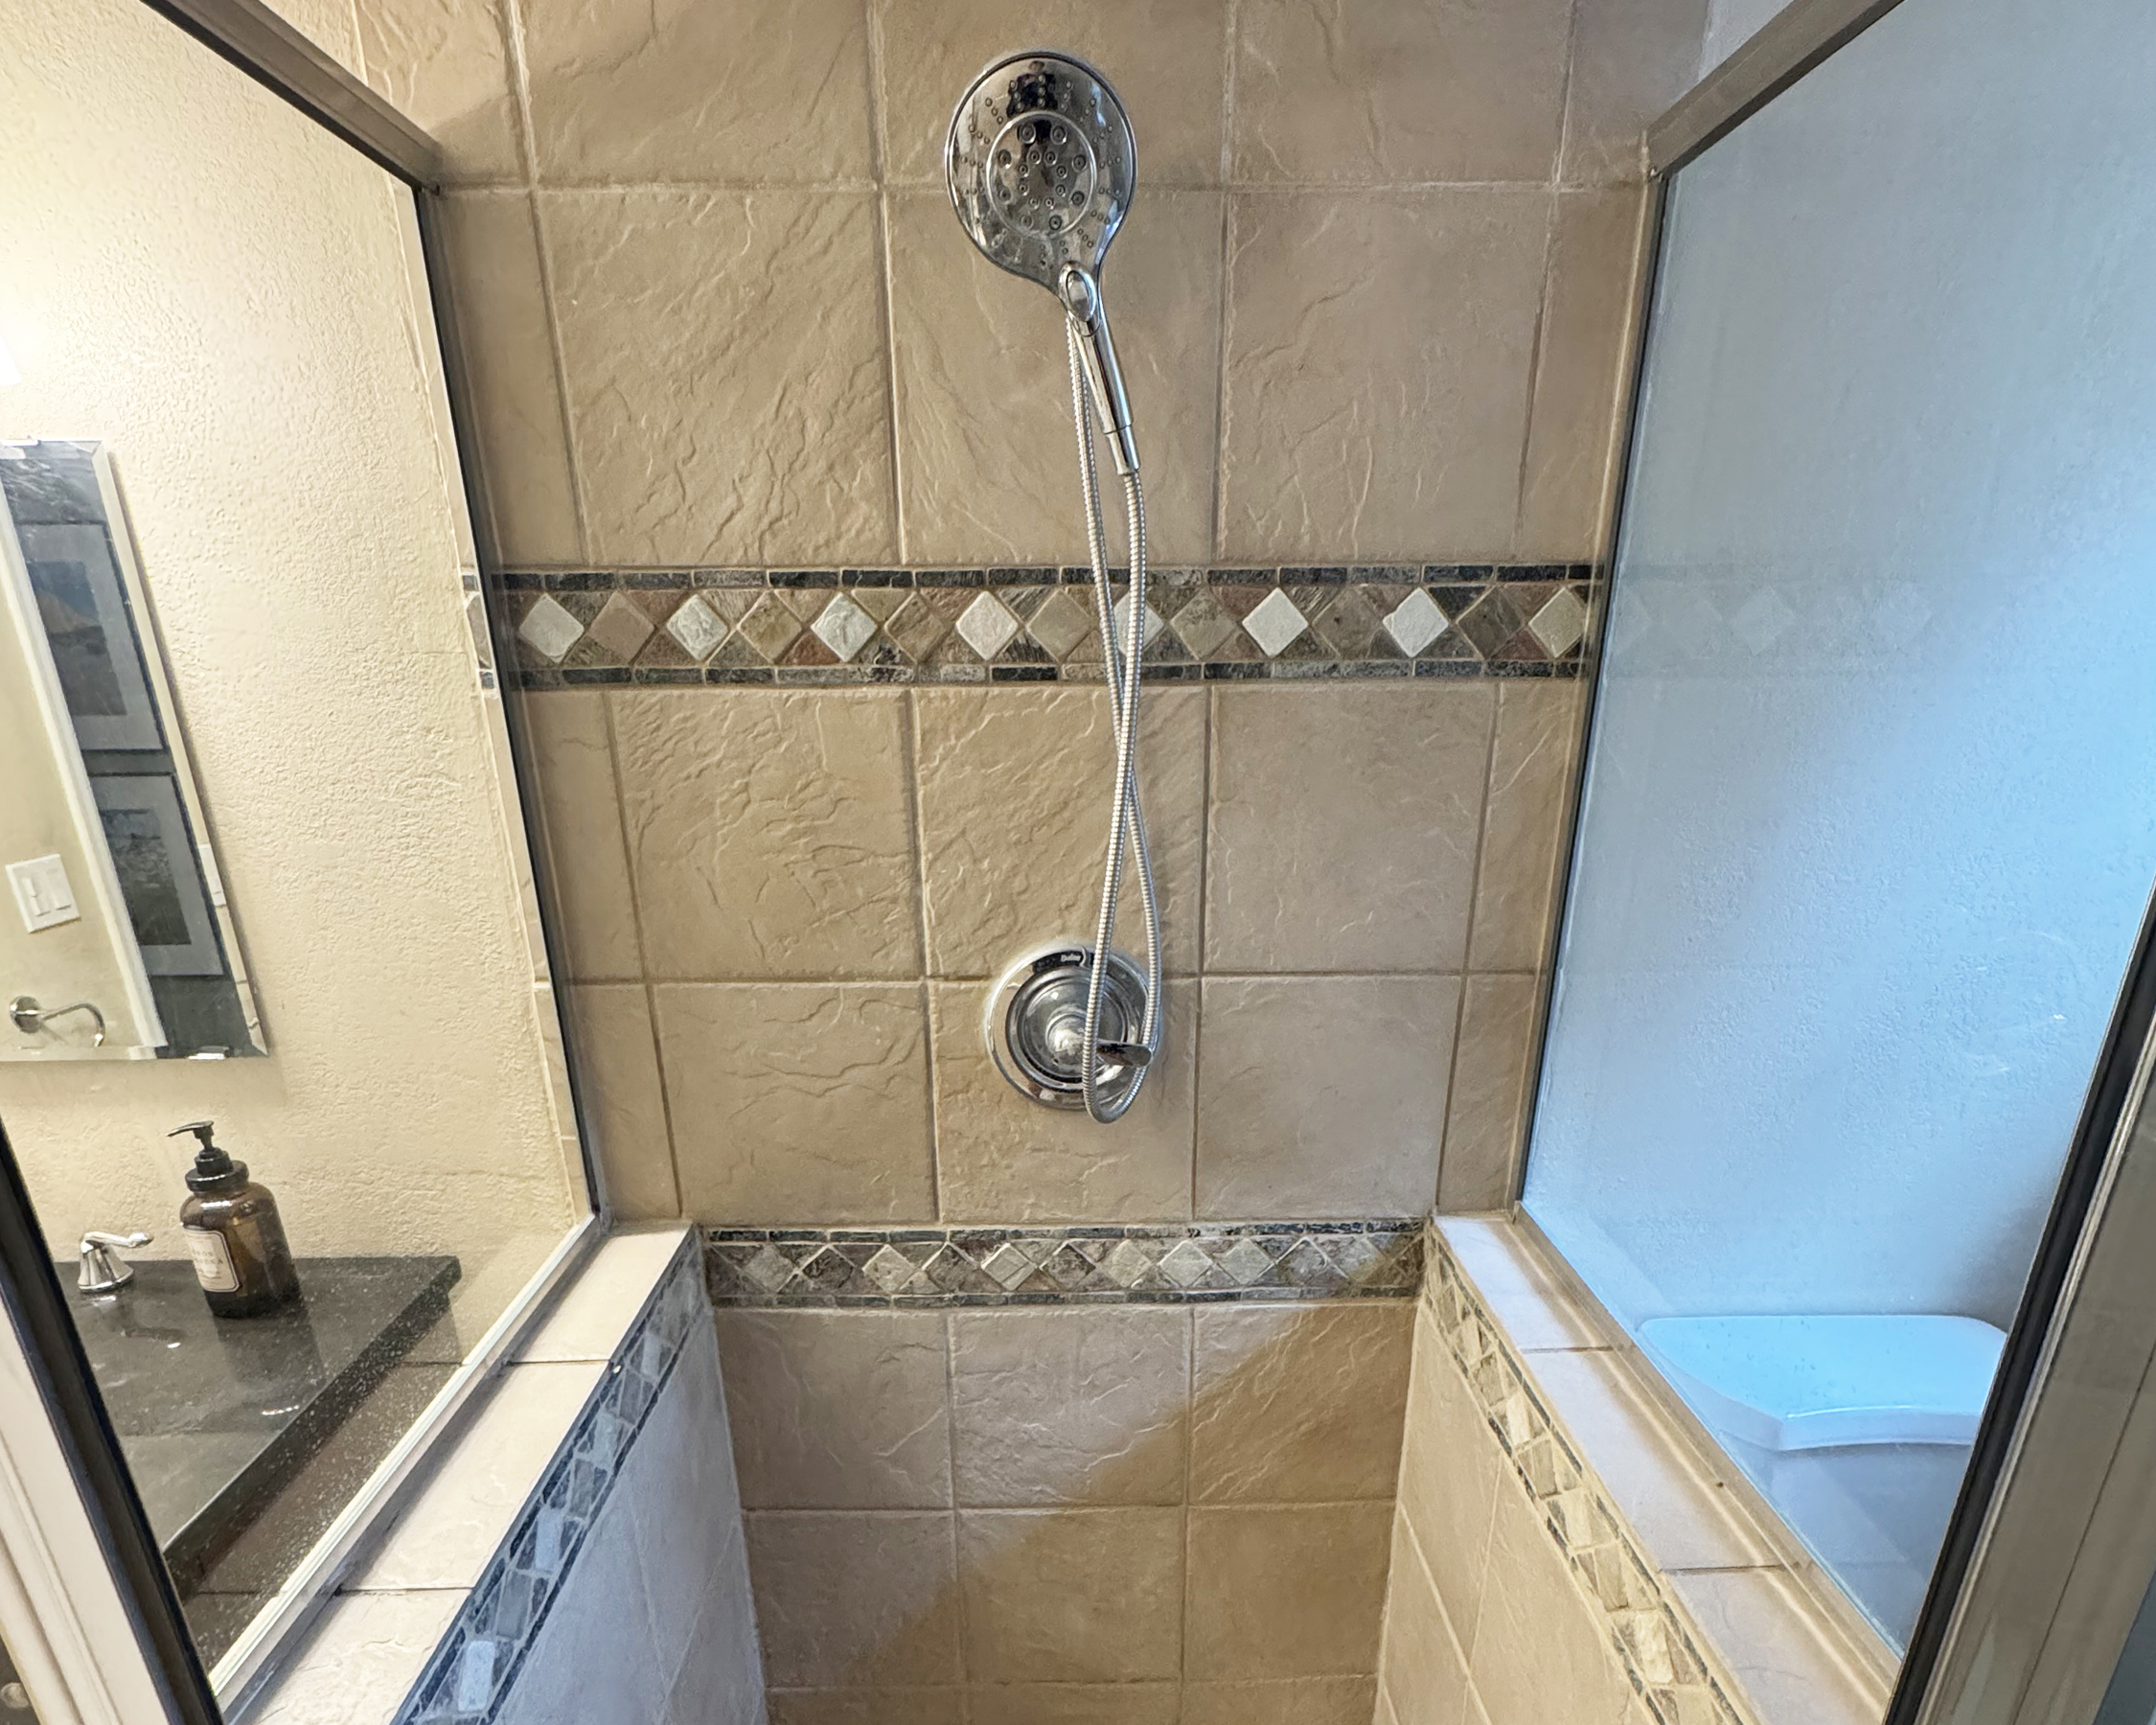
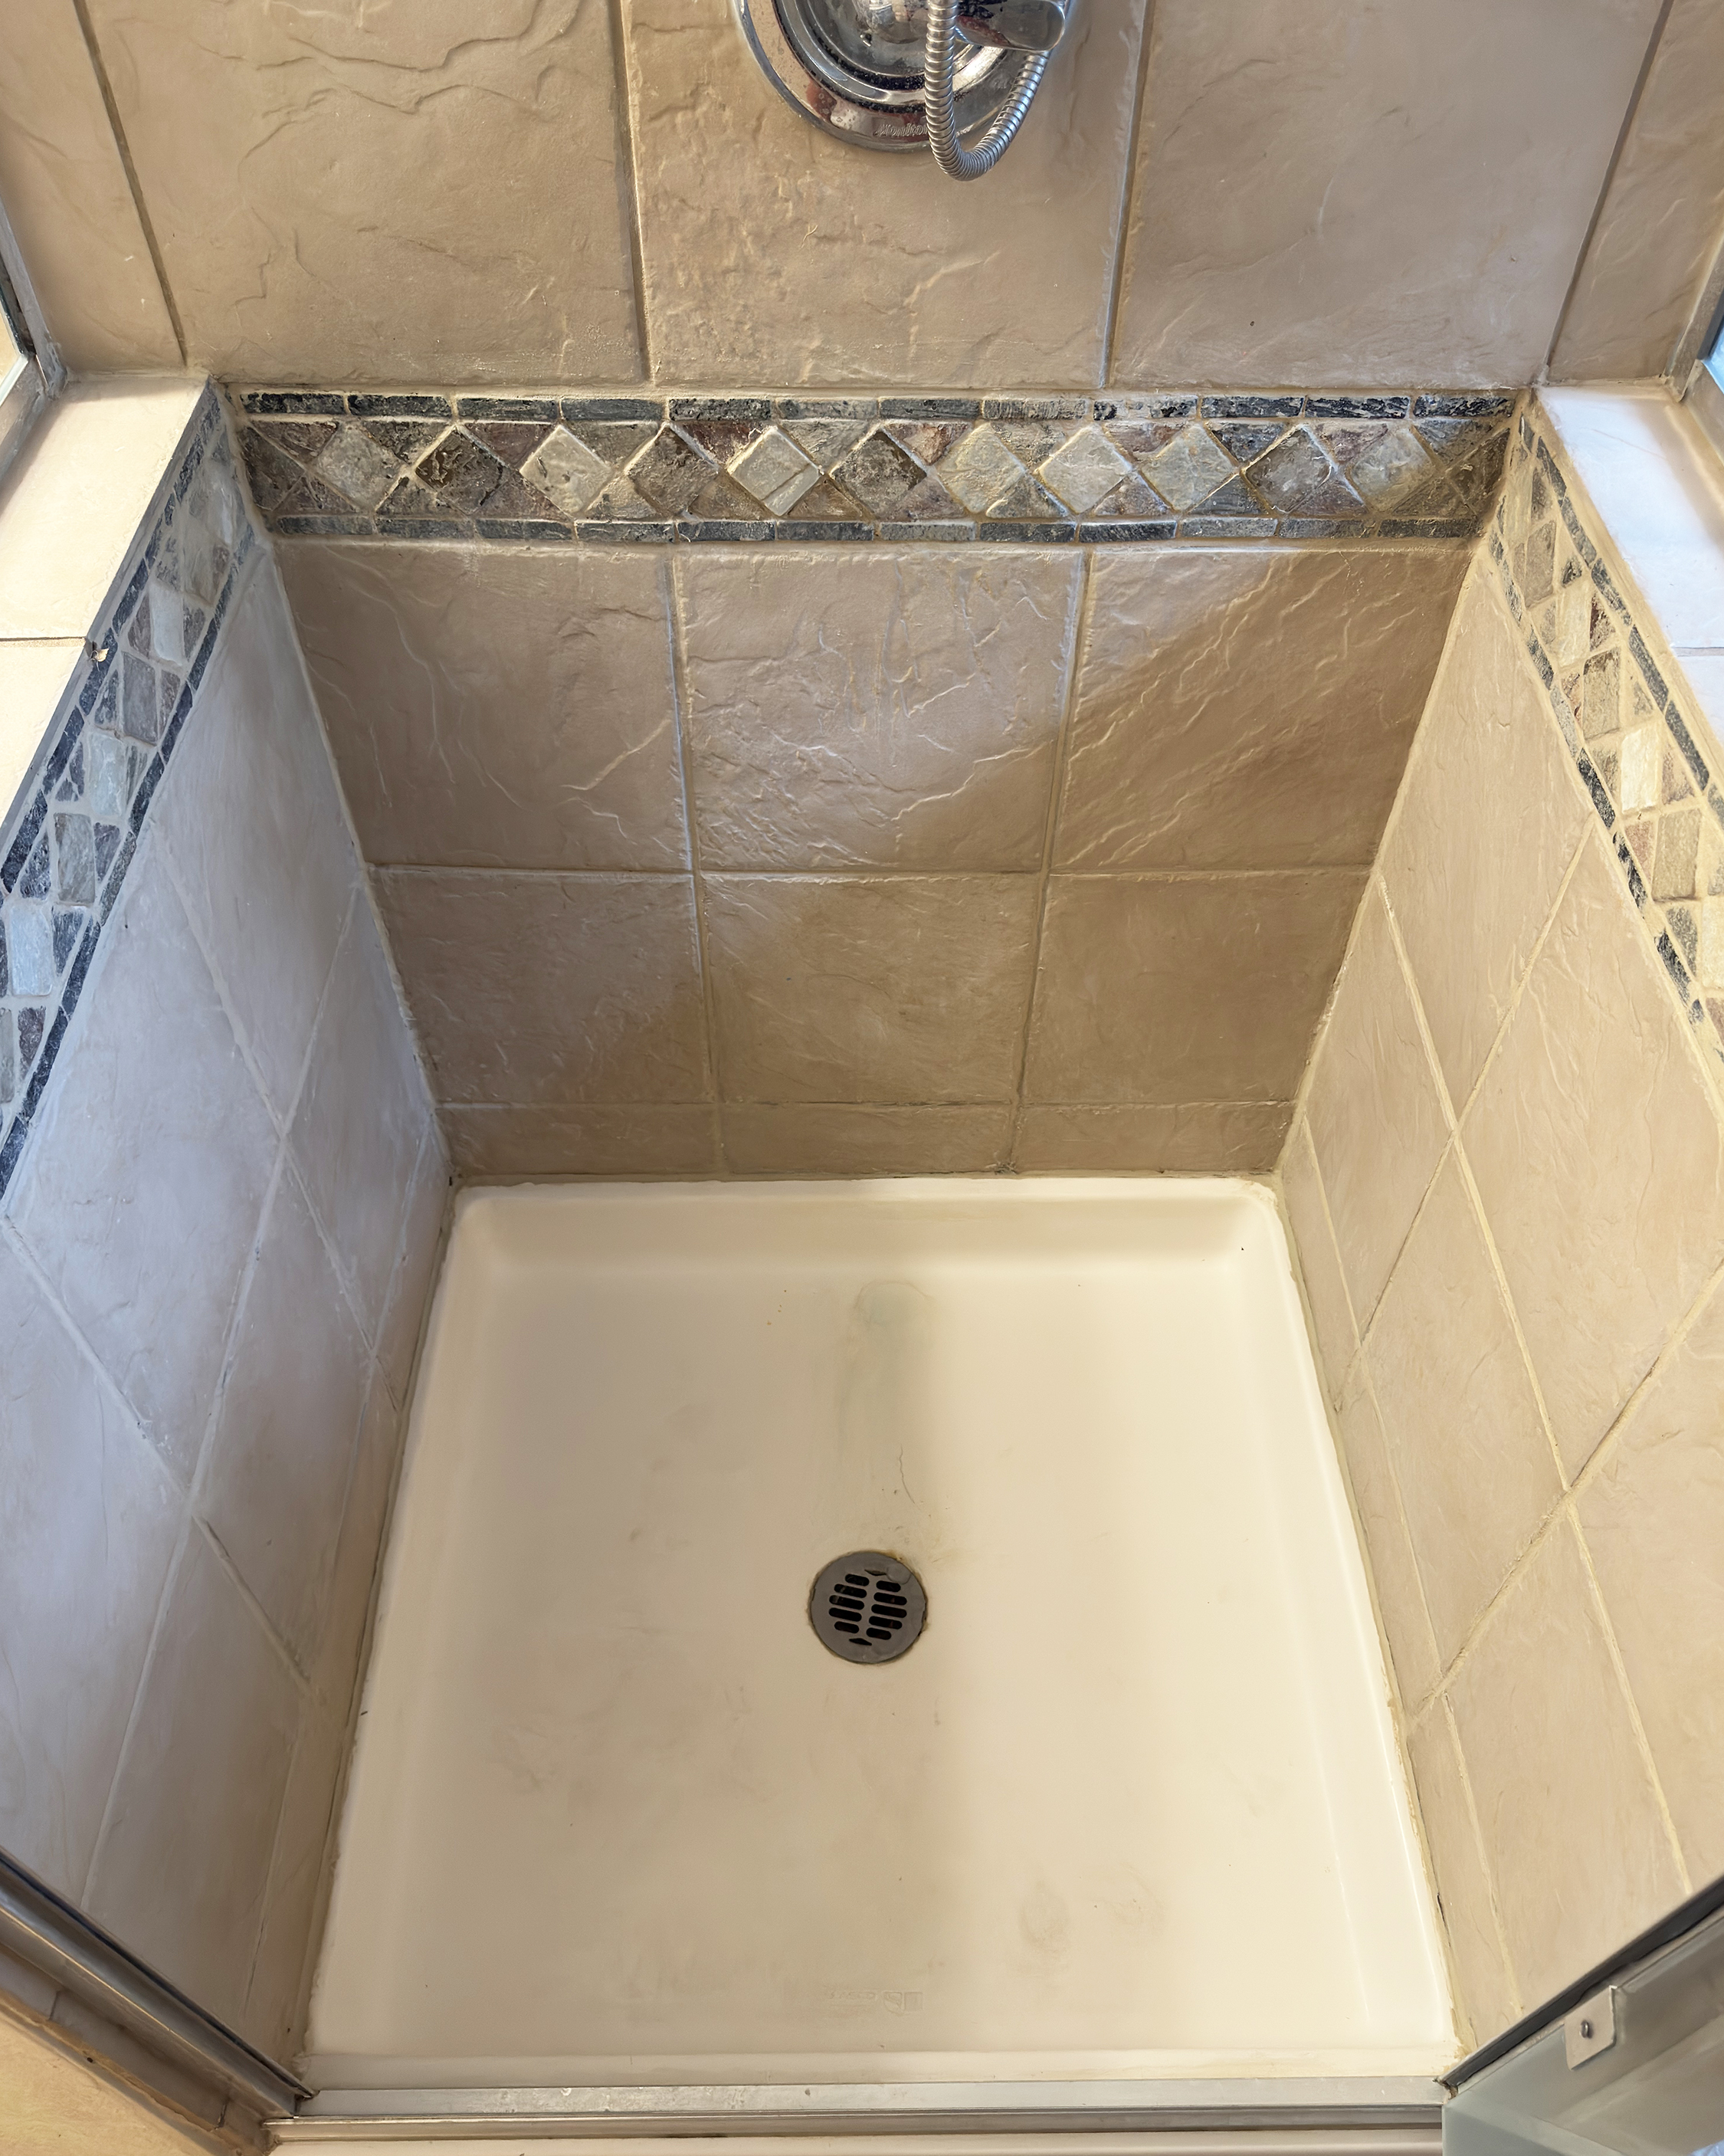

The shower was very outdated, the tile and shower pan were not in great shape and quite frankly it was just plain ugly to look at. The micro cement option would cover all of the tile with only some light prep work and then magically make it all disappear, leaving me with a unique and beautiful new look.
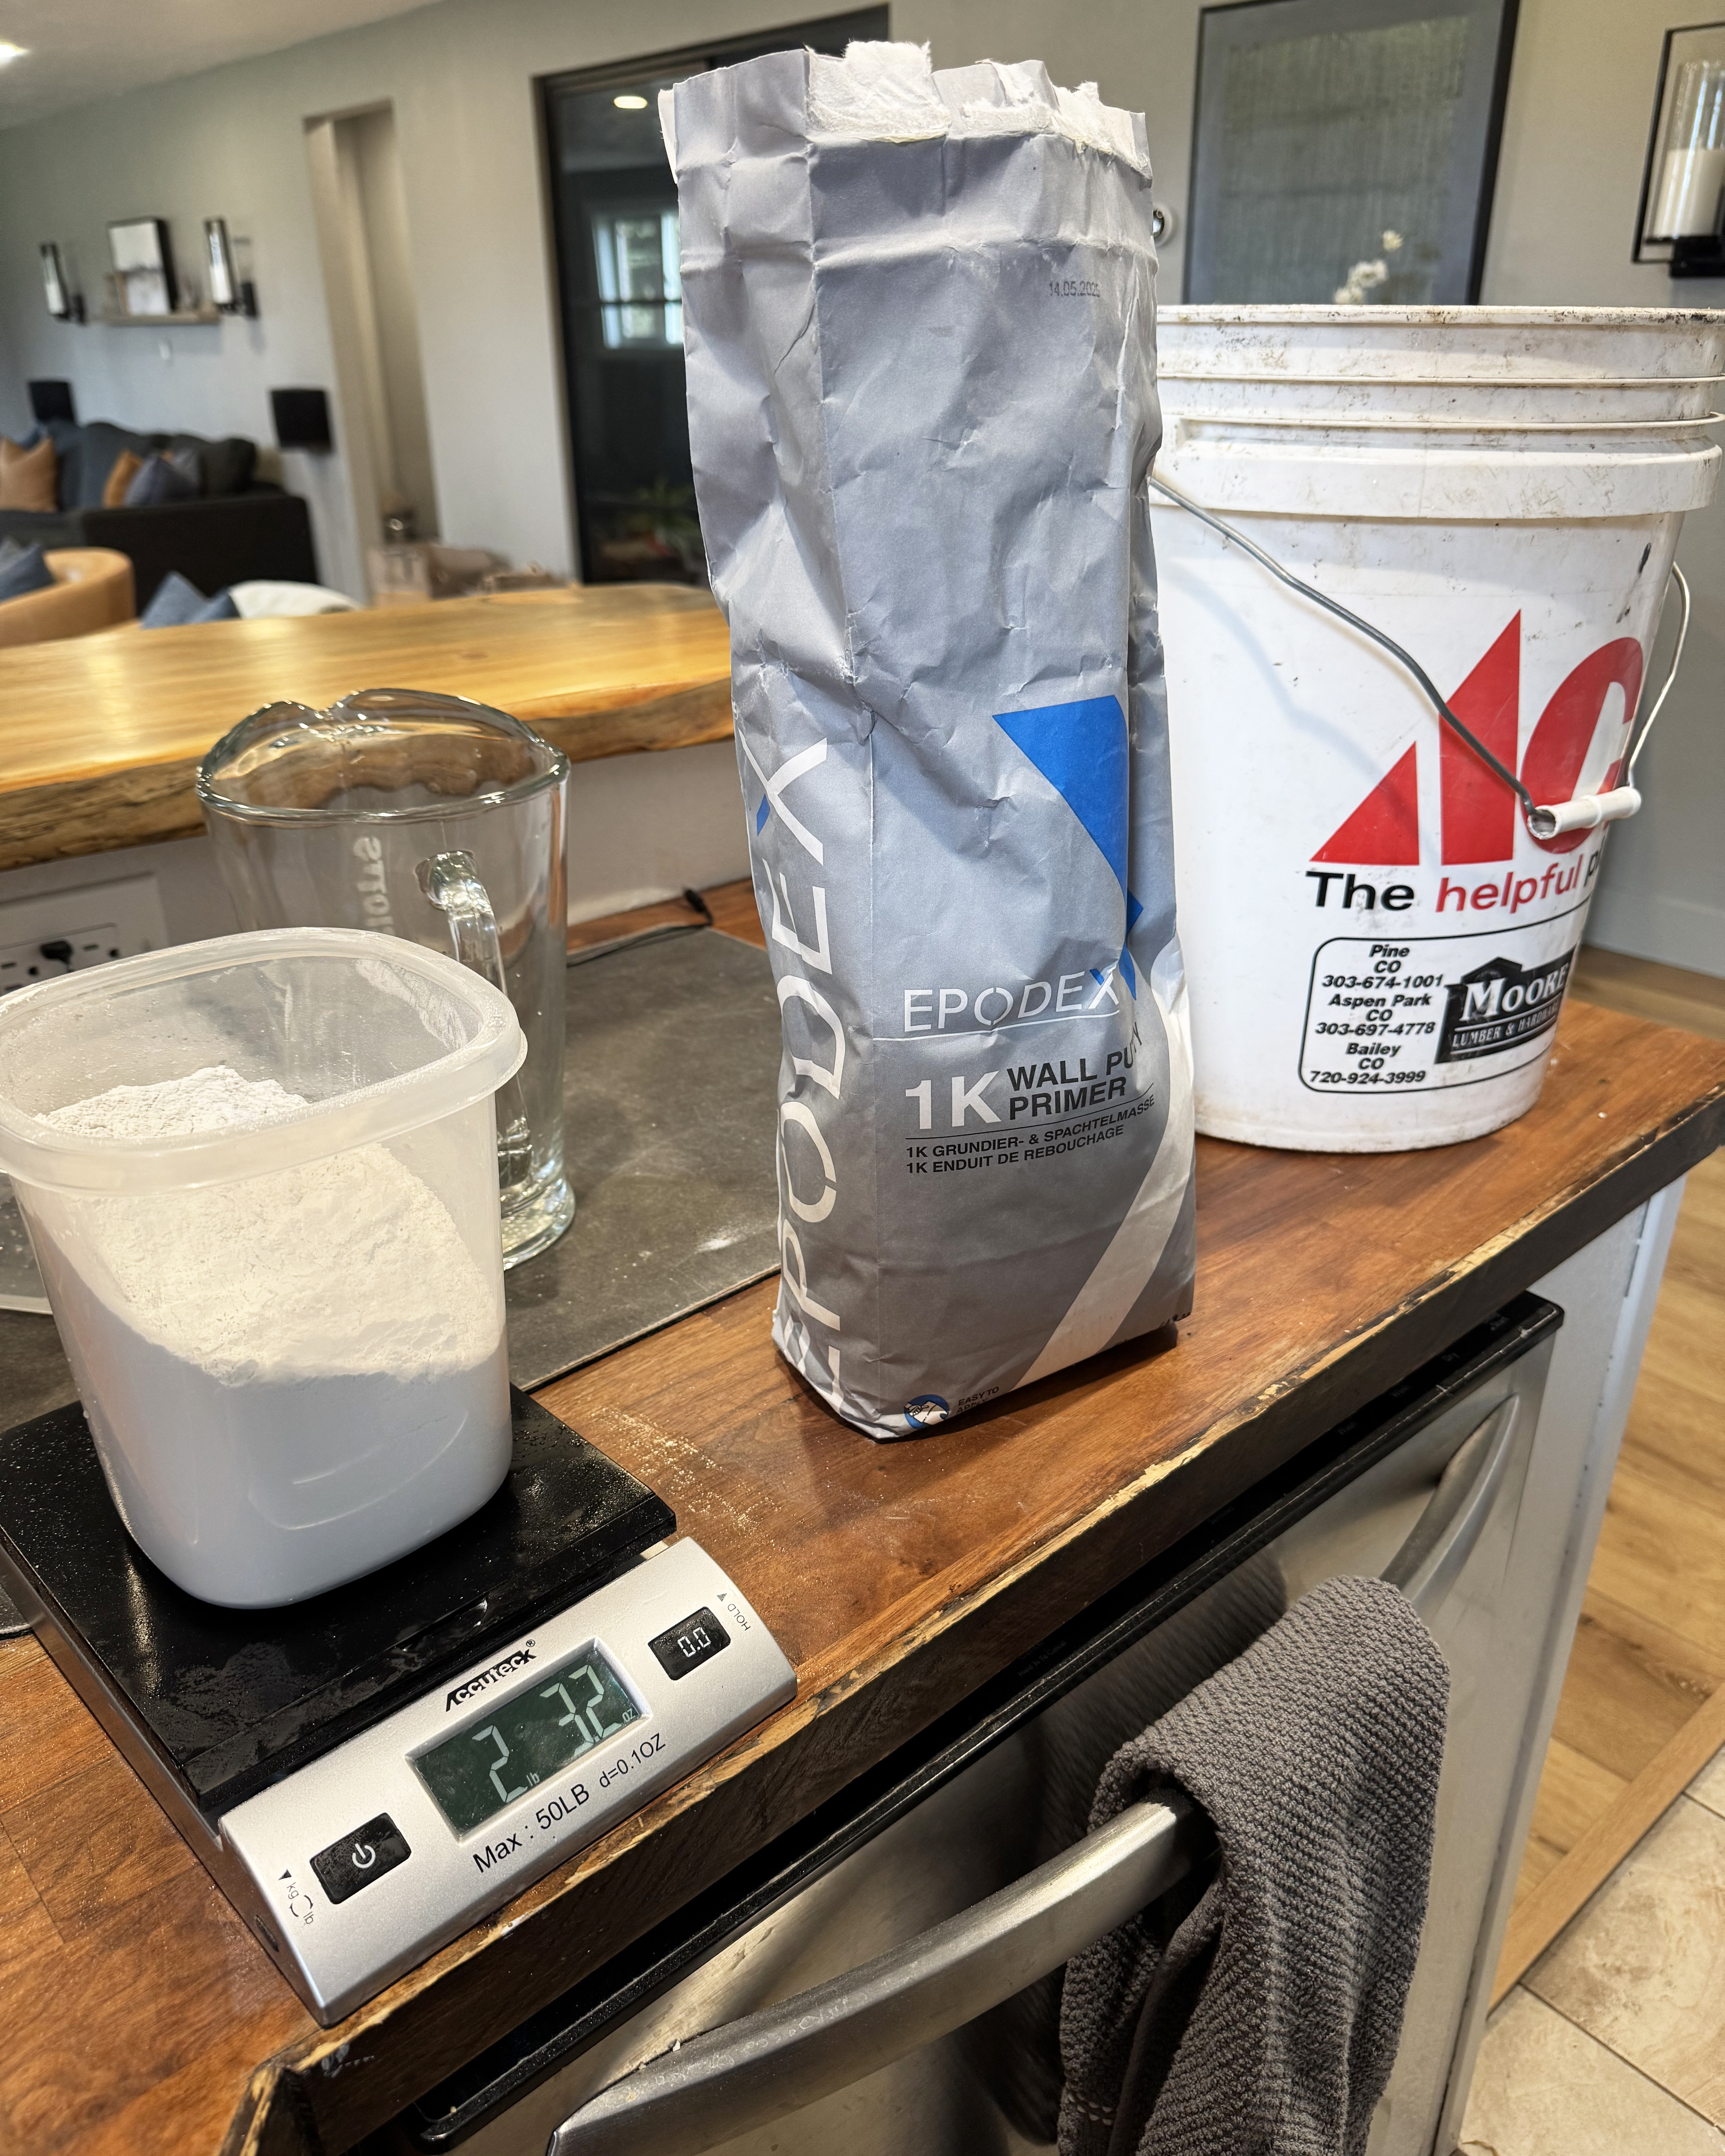
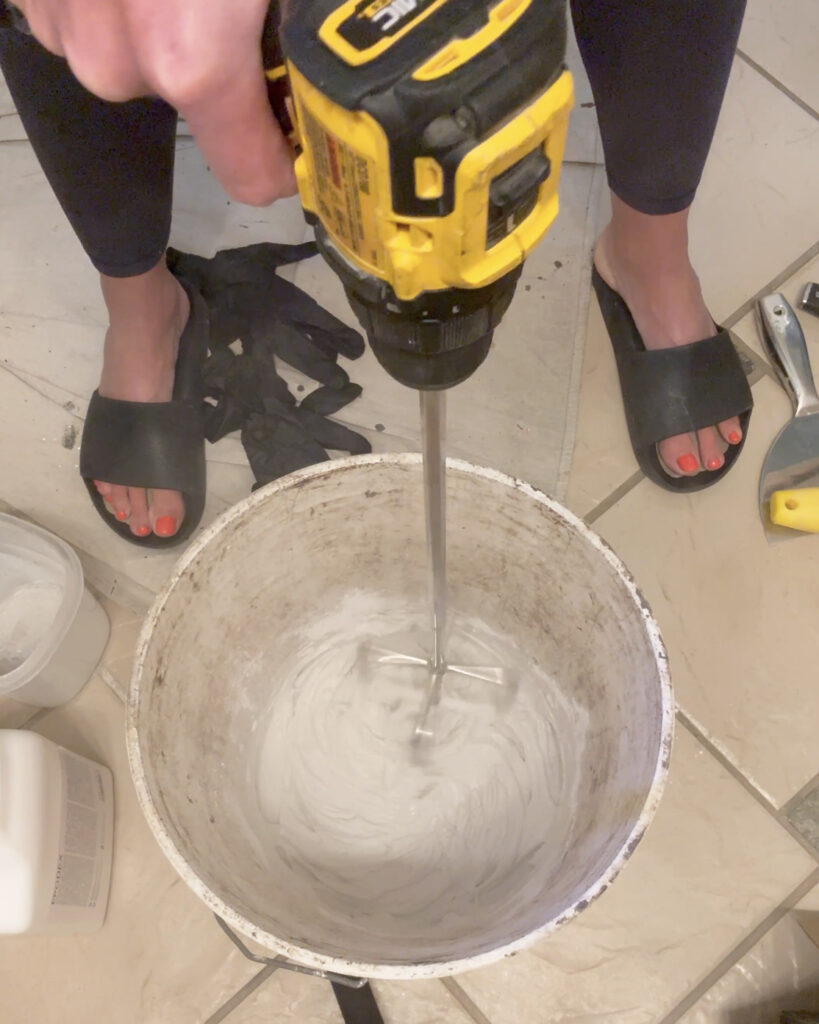
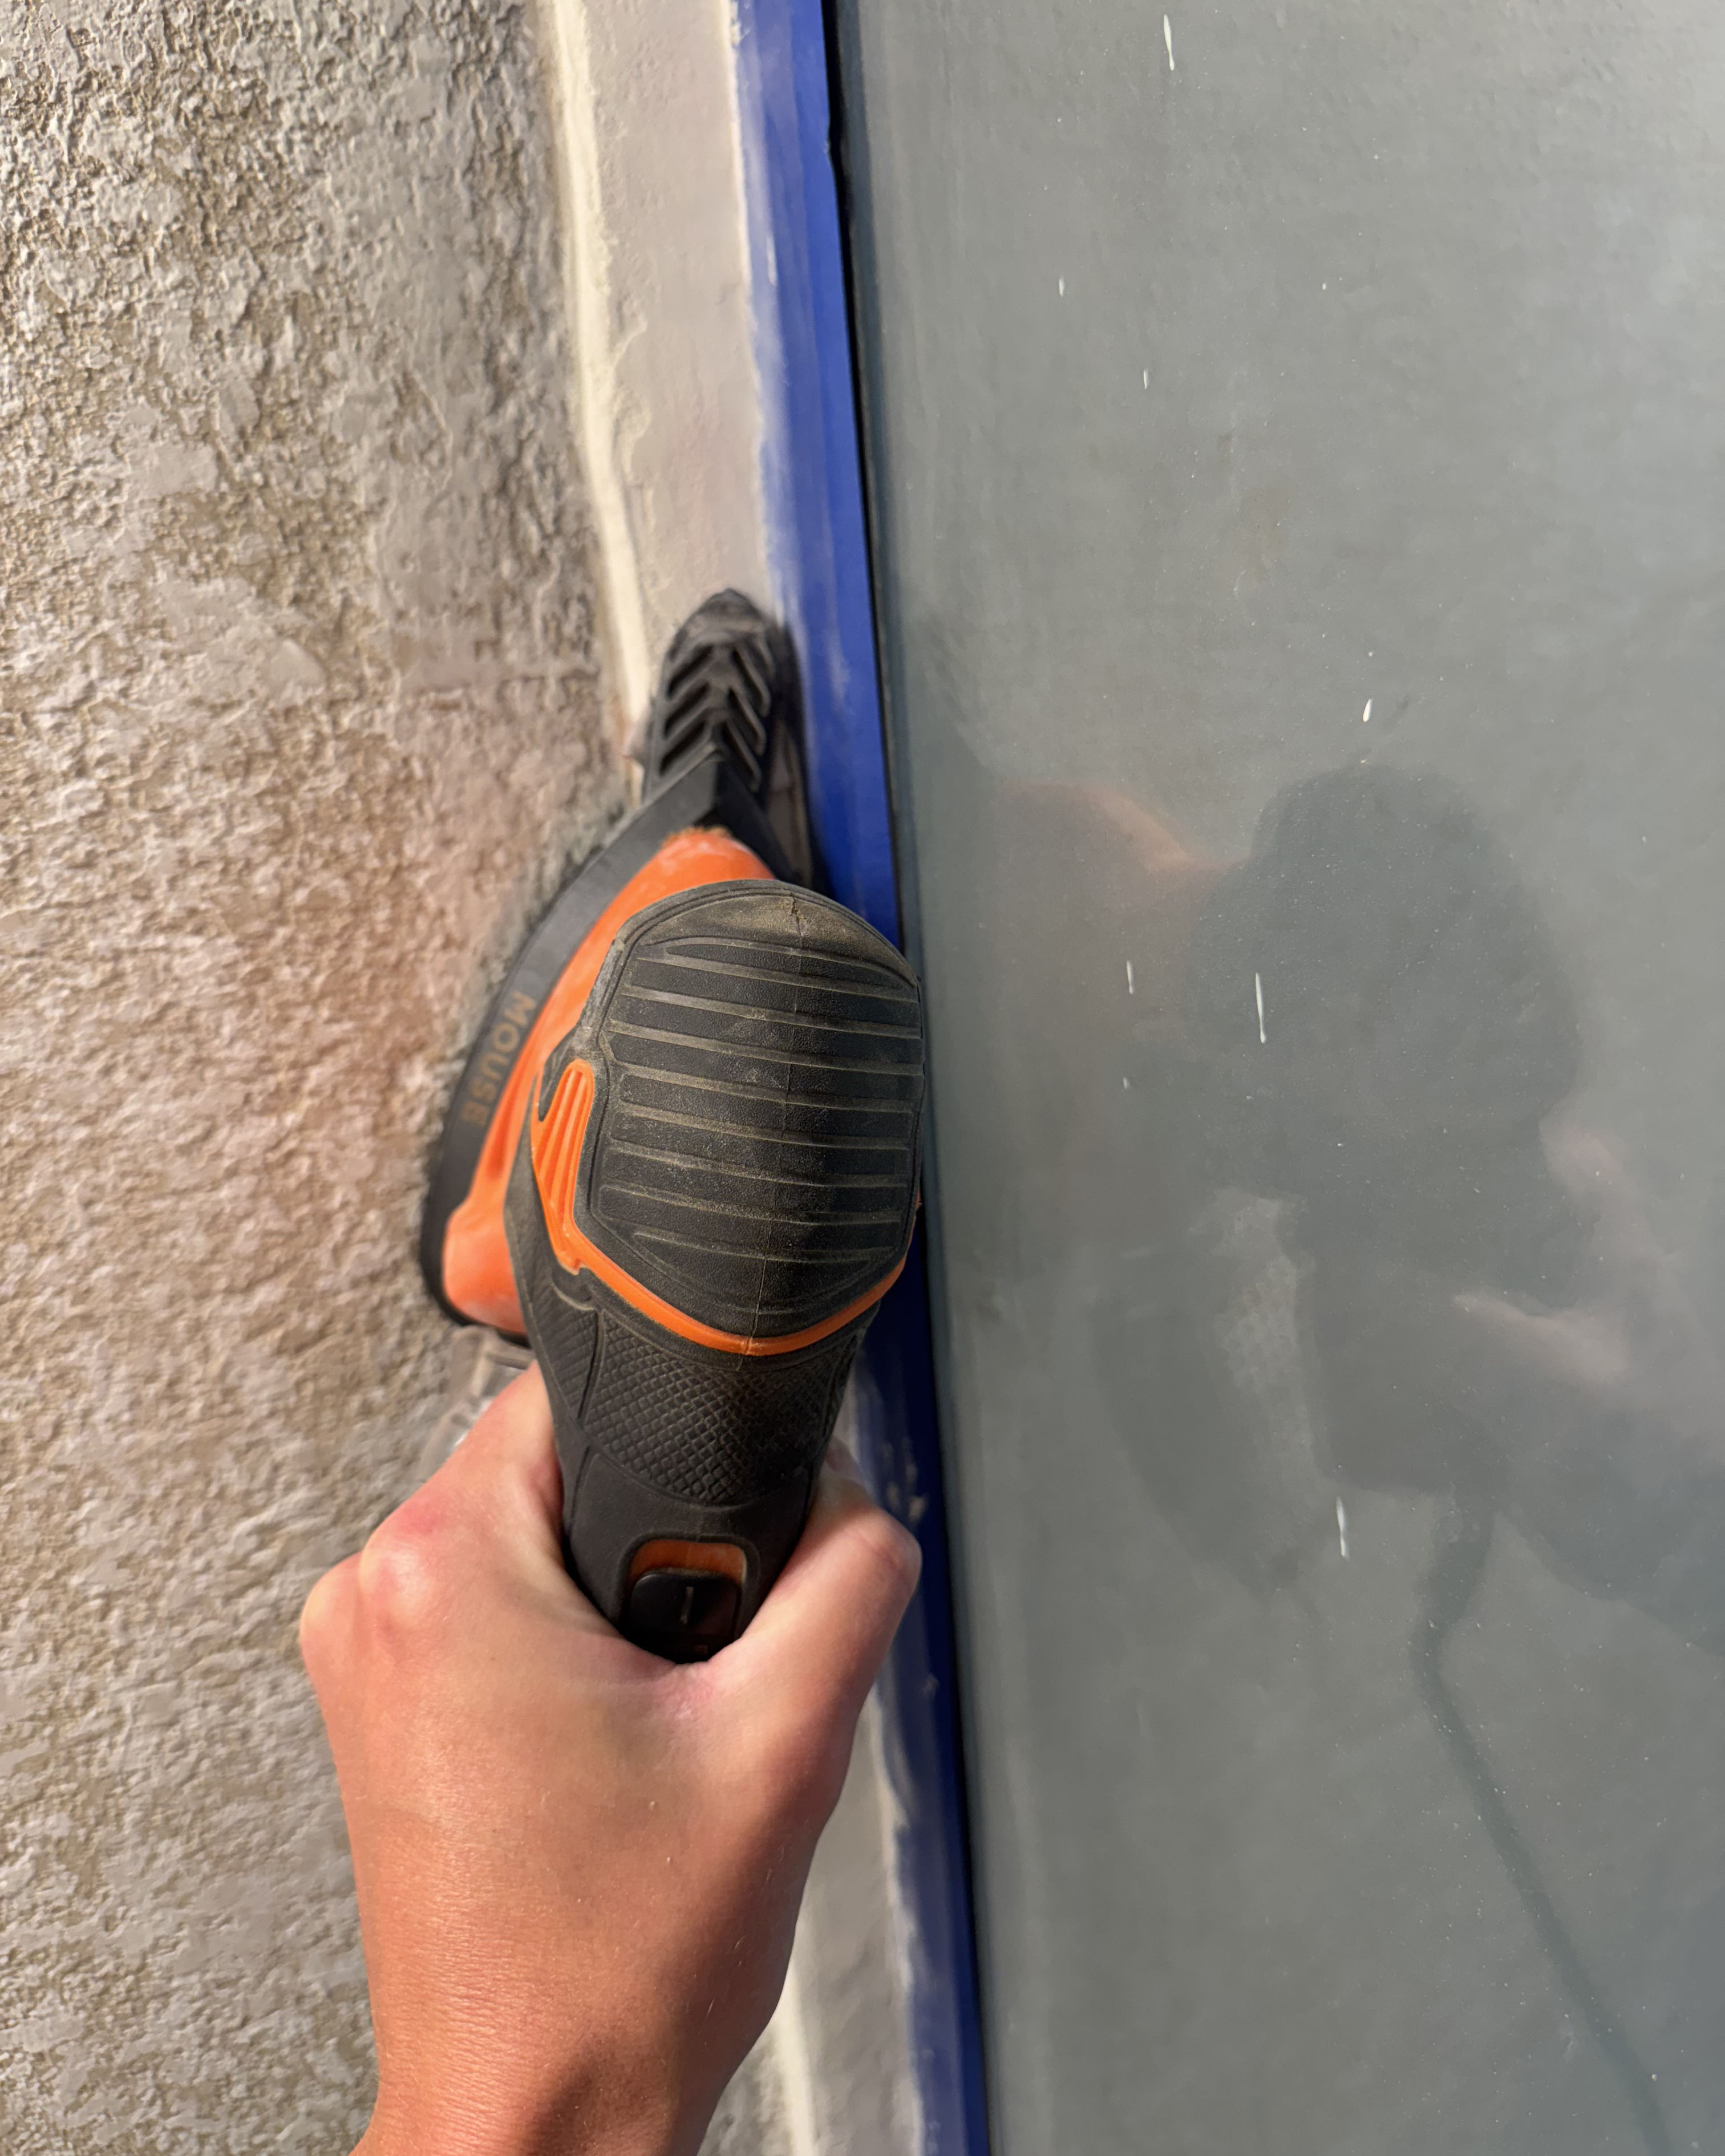
I started by scraping some of the old silicone and then giving the shower a thorough clean using a degreaser and brush. After the prep was done I could apply the wall primer putty that was included in the tile kit I purchased. This was used to fill in all the grout lines and high points, and help give the micro cement product a stronger bond. I weighed out the dry product and water as per the instructions, mixed it up in a bucket with a paddle mixer and got started.
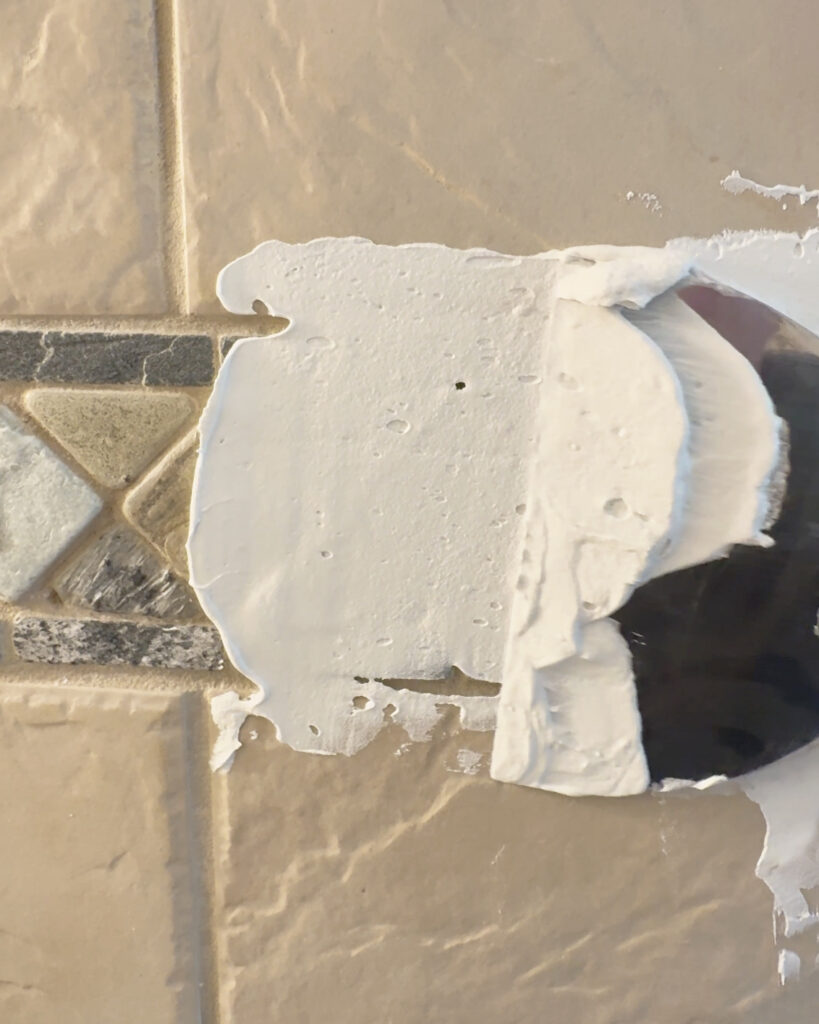
I used a small trowel and worked the primer into all the grout lines to achieve a relatively flat surface. This part was super satisfying to watch the old tile disappear for good! I let the primer dry overnight before starting on the next step.
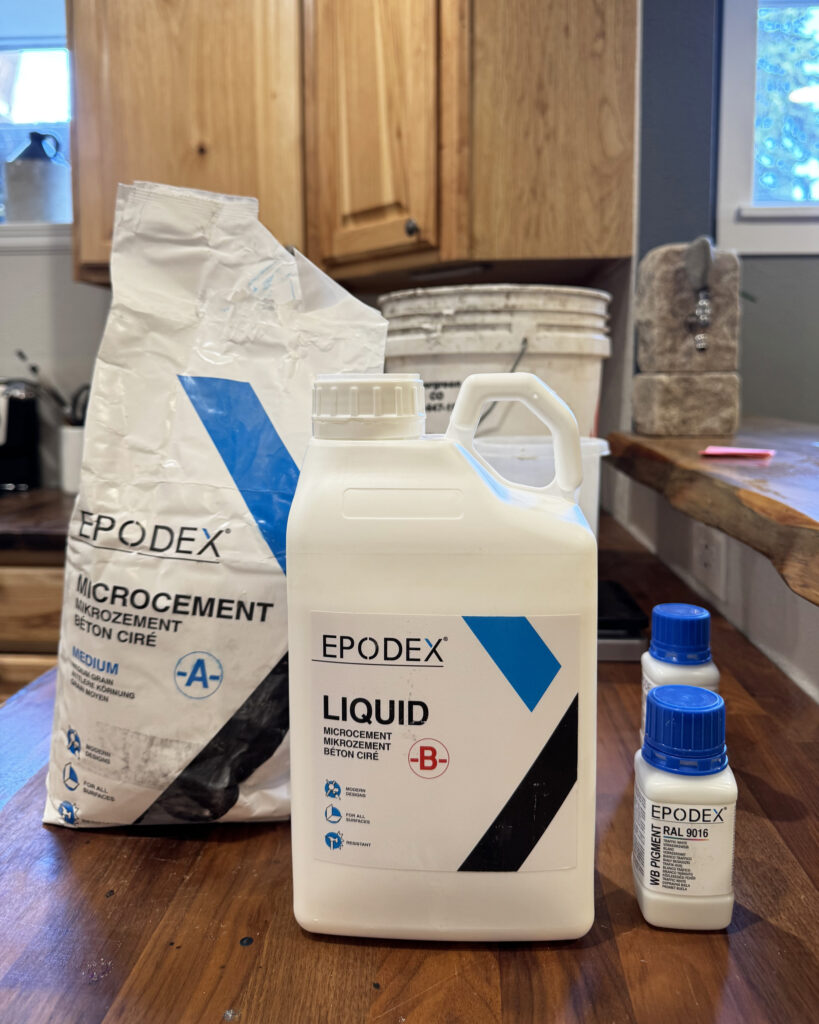
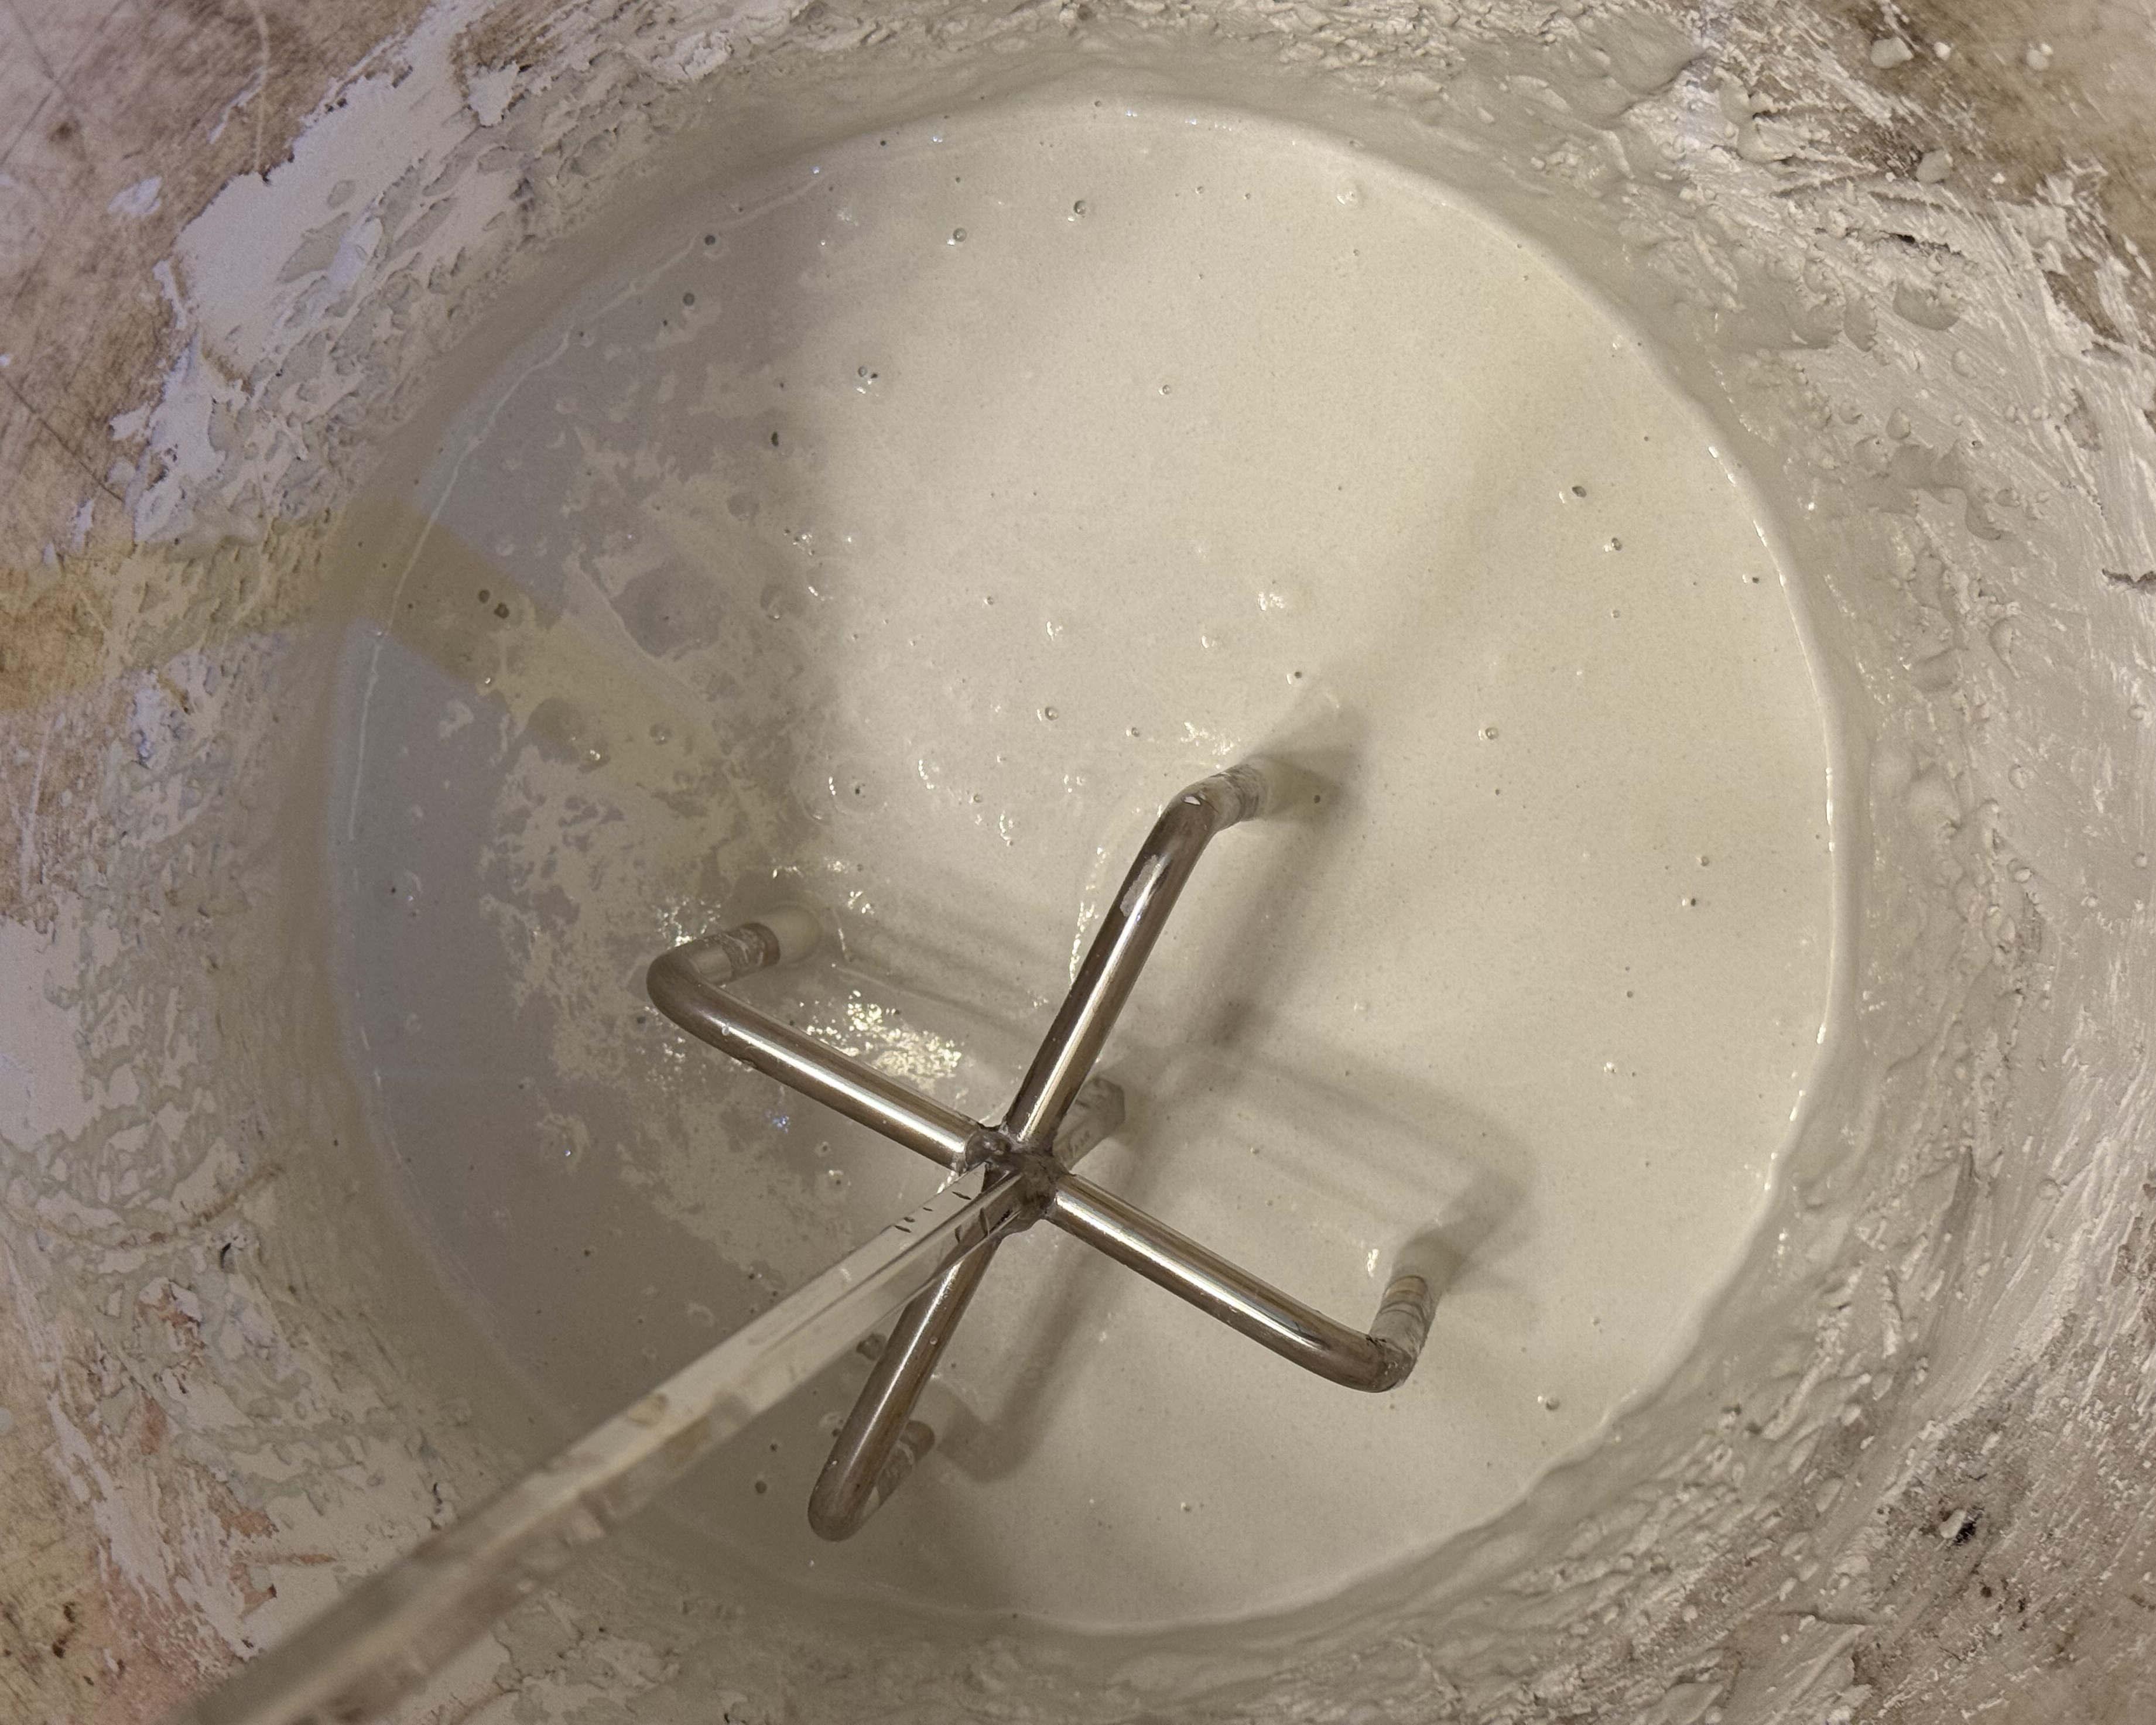
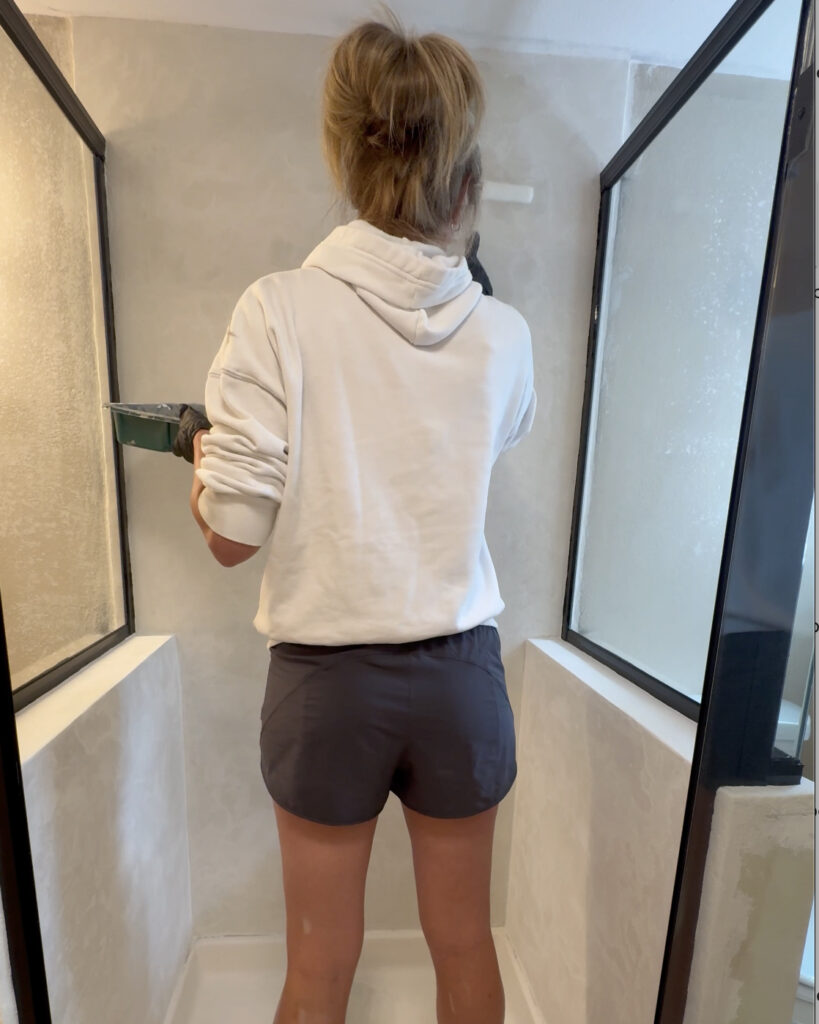
Next was micro cement! Again I used my scale to measure everything out, which included the microcement powder, liquid agent and color dye. Once measured I added them to my bucket and used my paddle mixer to mix it all up.
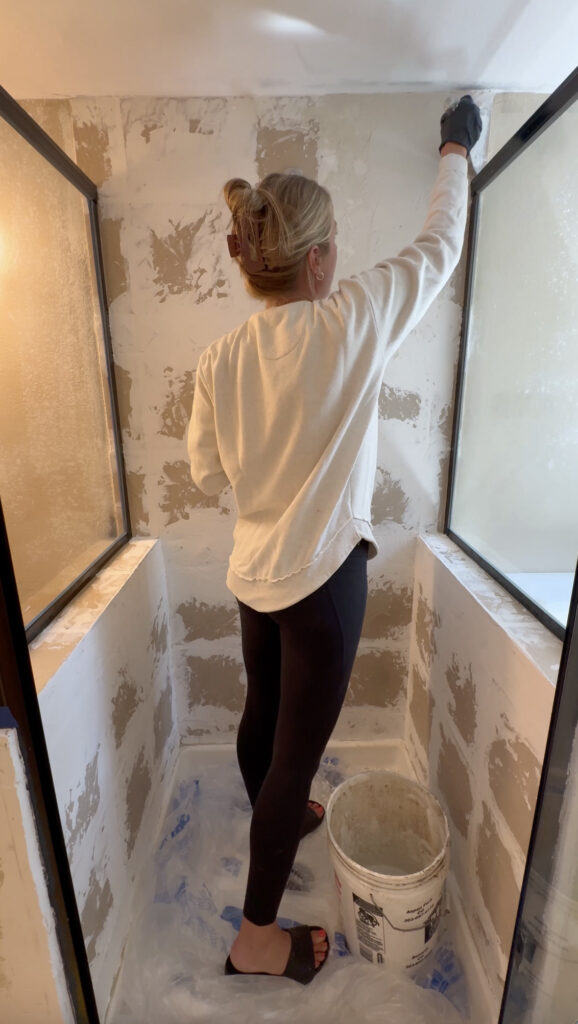
I started in the upper right corner and worked my way down and to the left using my hand trowel with light, even pressure. I personally wanted a somewhat polished finish with some slight imperfections to still keep some of the raw concrete characteristics. To achieve this I applied the micro cement as evenly as possible, and then went in with my orbital sander and 60 grit sandpaper to smooth out any high points that were left behind.
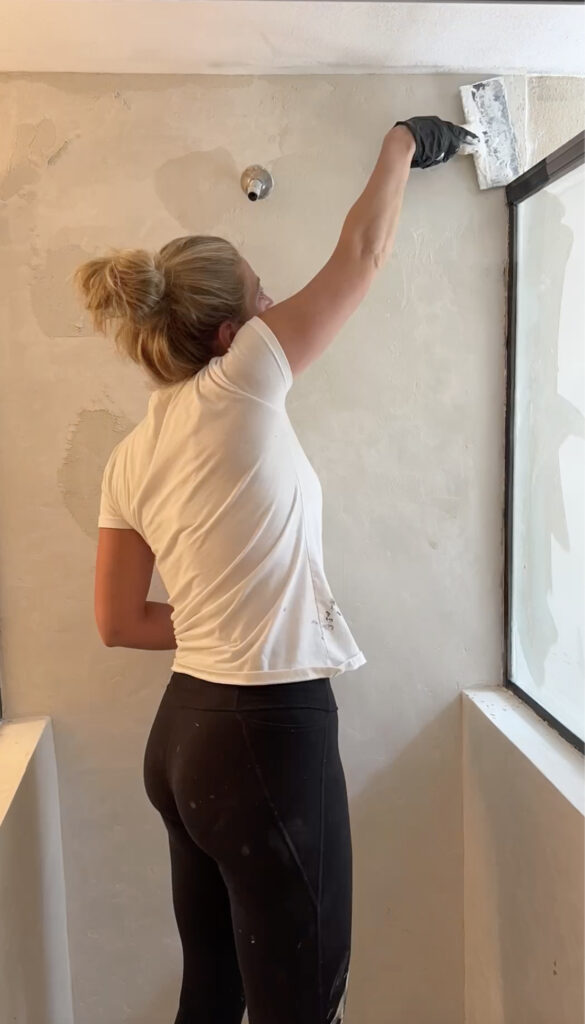
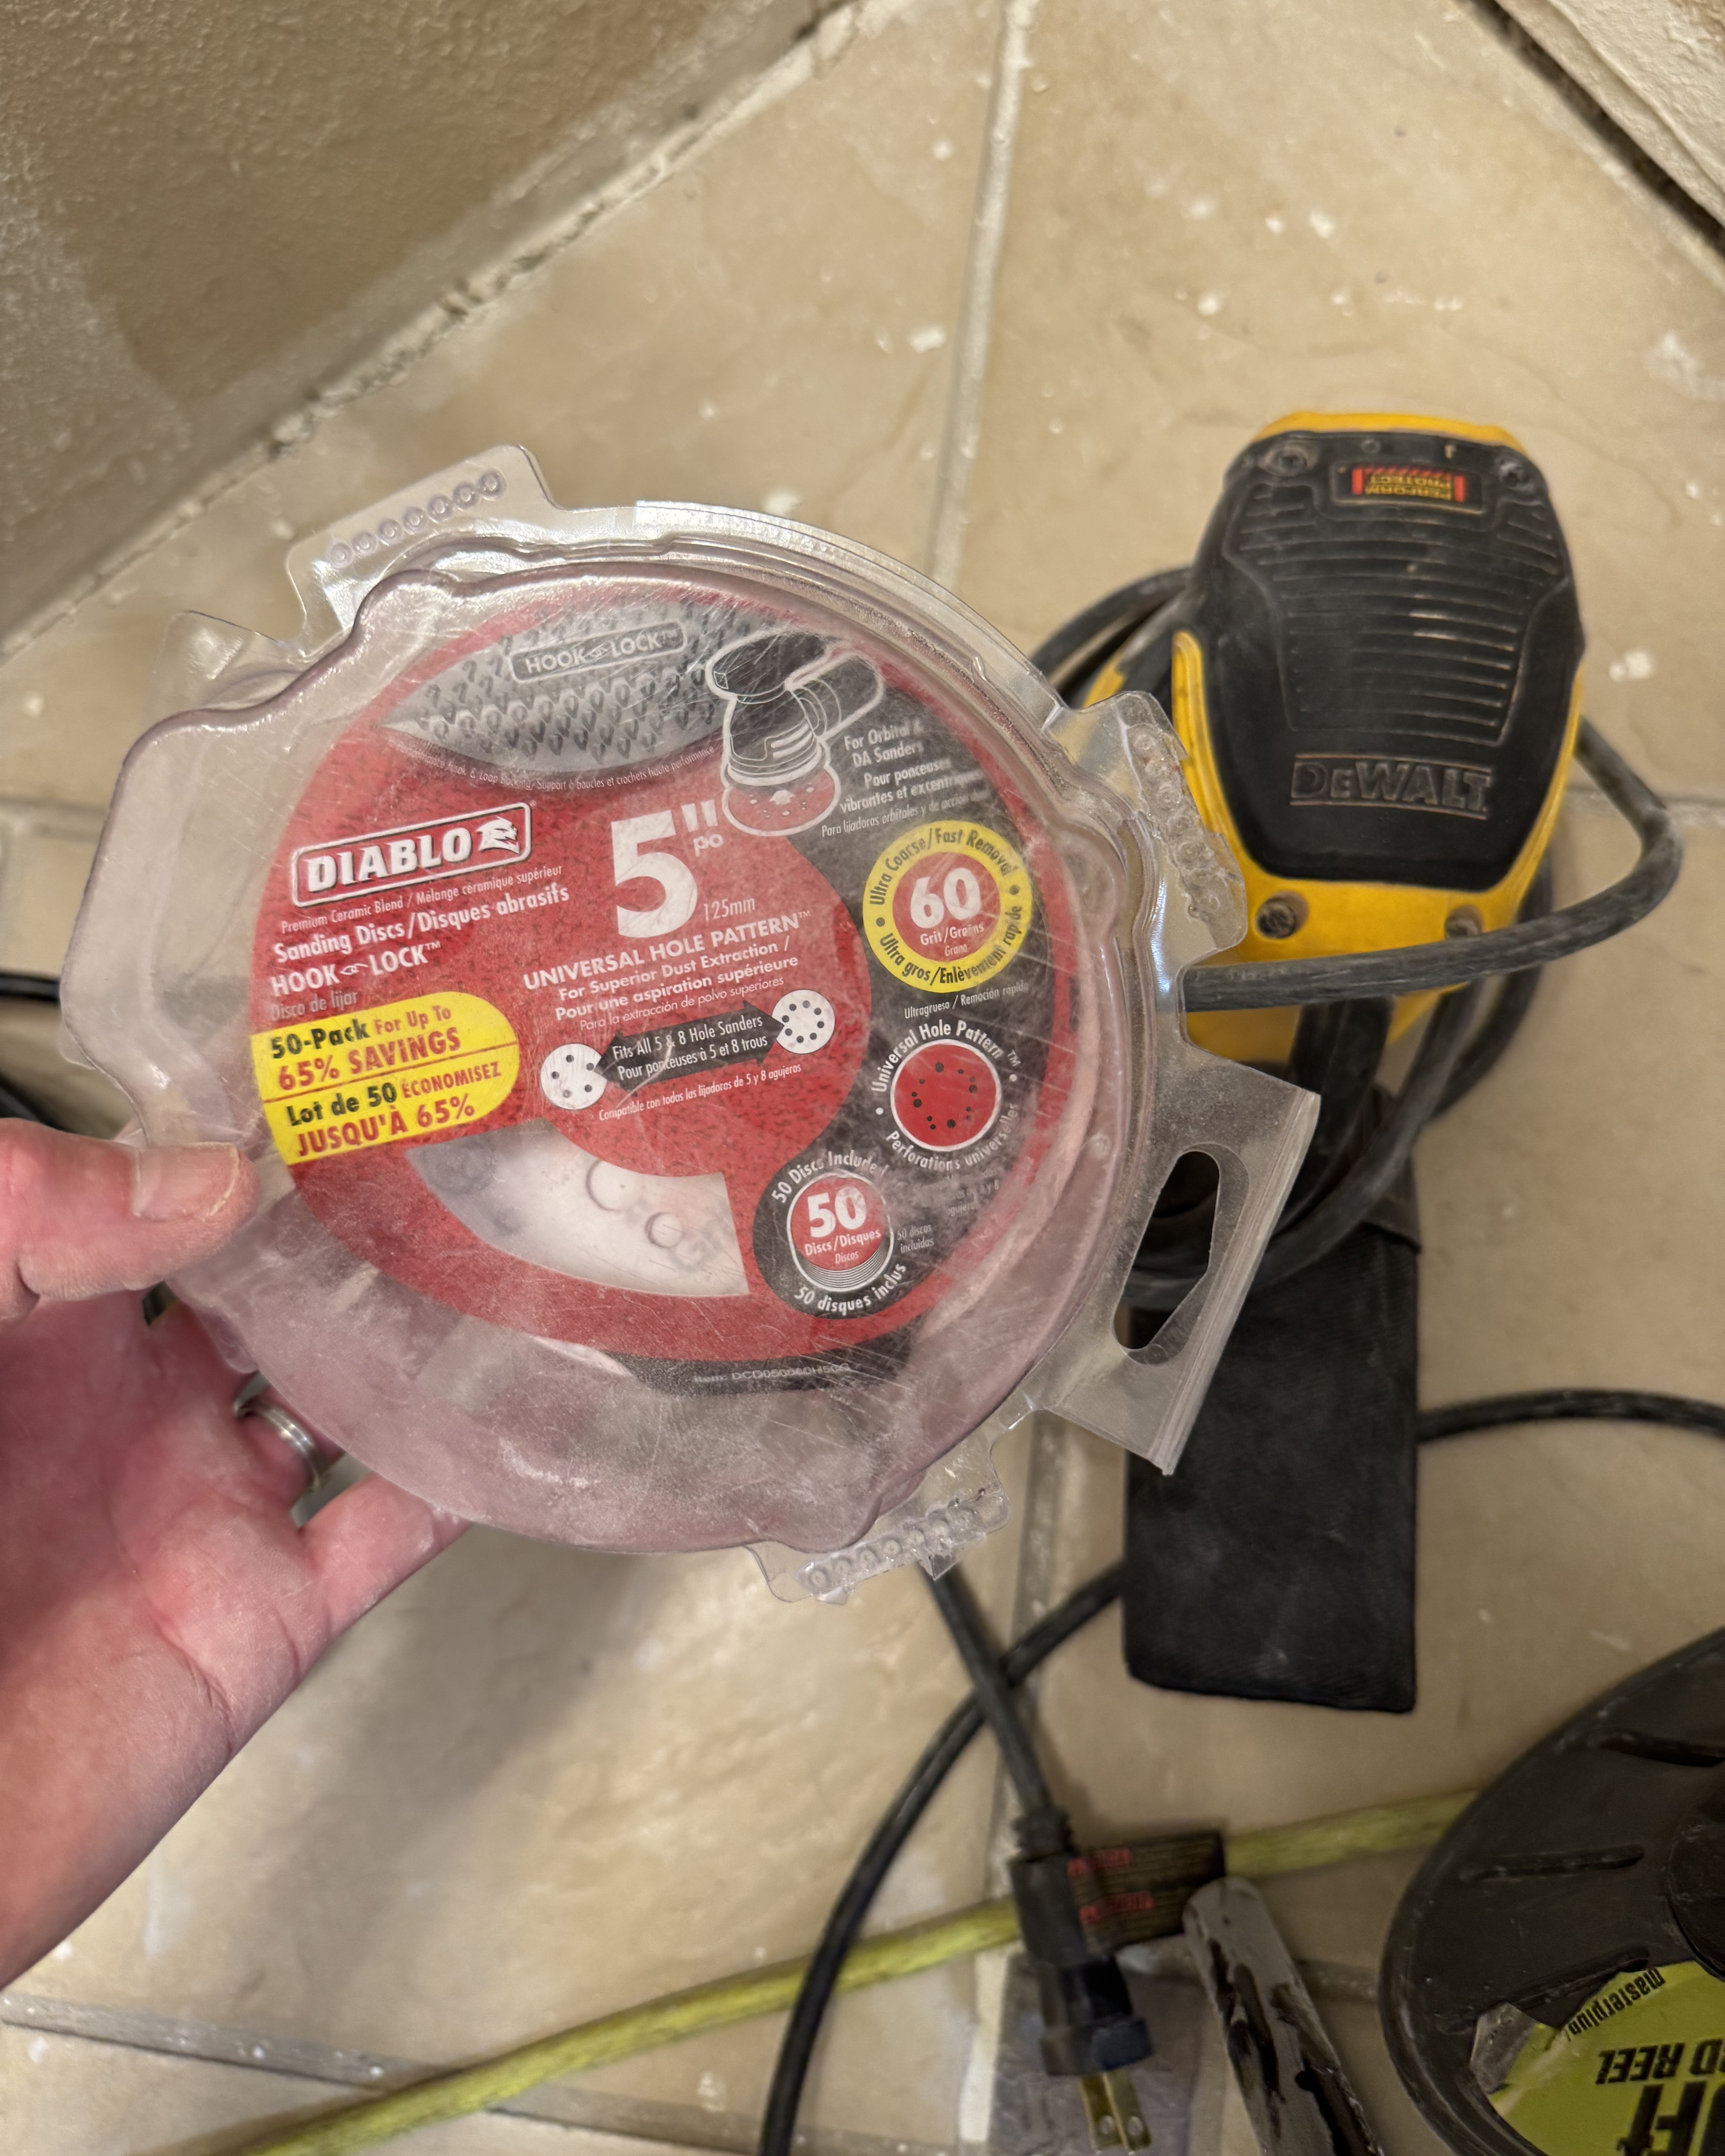
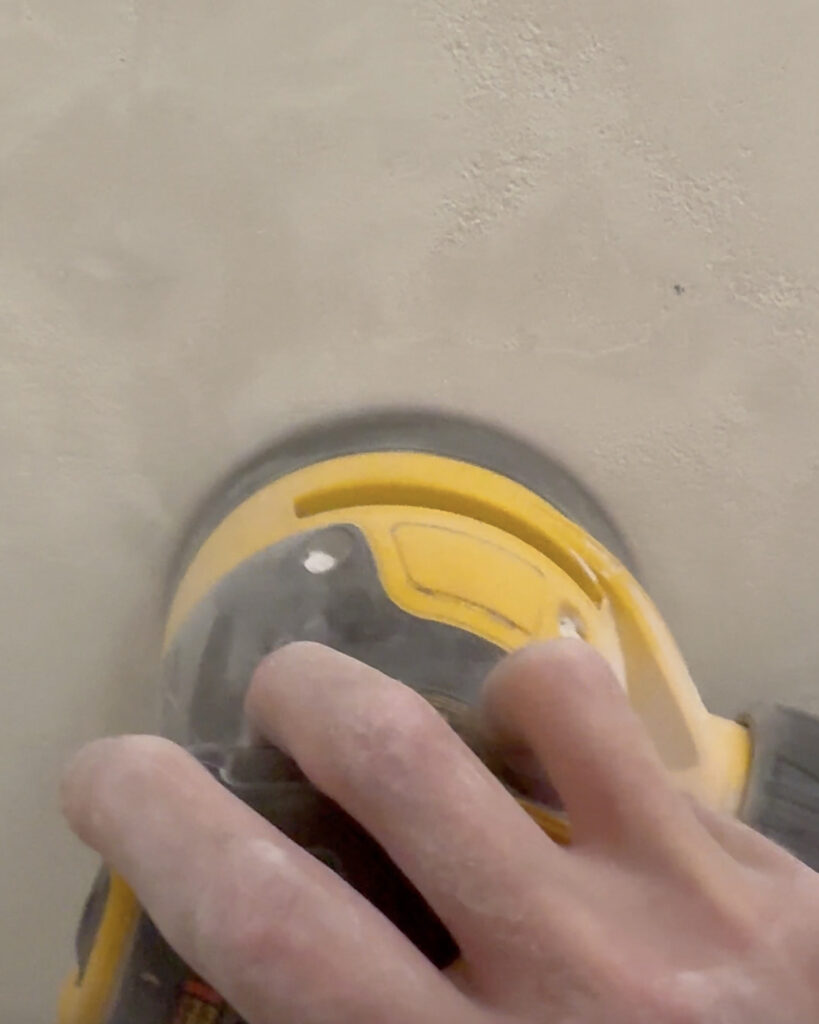
After letting the first coat of microcement cure overnight, I then went in with a second coat, repeating the same process I did previously. After letting the second coat dry I went in with my orbital sander with a 60 grit sandpaper to smooth out all the high points, then again with a 120 grit to give it a more polished look. I also used my detail sander to get in all the hard to reach areas.
This part was tedious, but this is what it took to get the desired polished look I was going after. Some people opt for a more rough concrete look which wouldn’t require this additional step – totally optional and whatever you prefer!
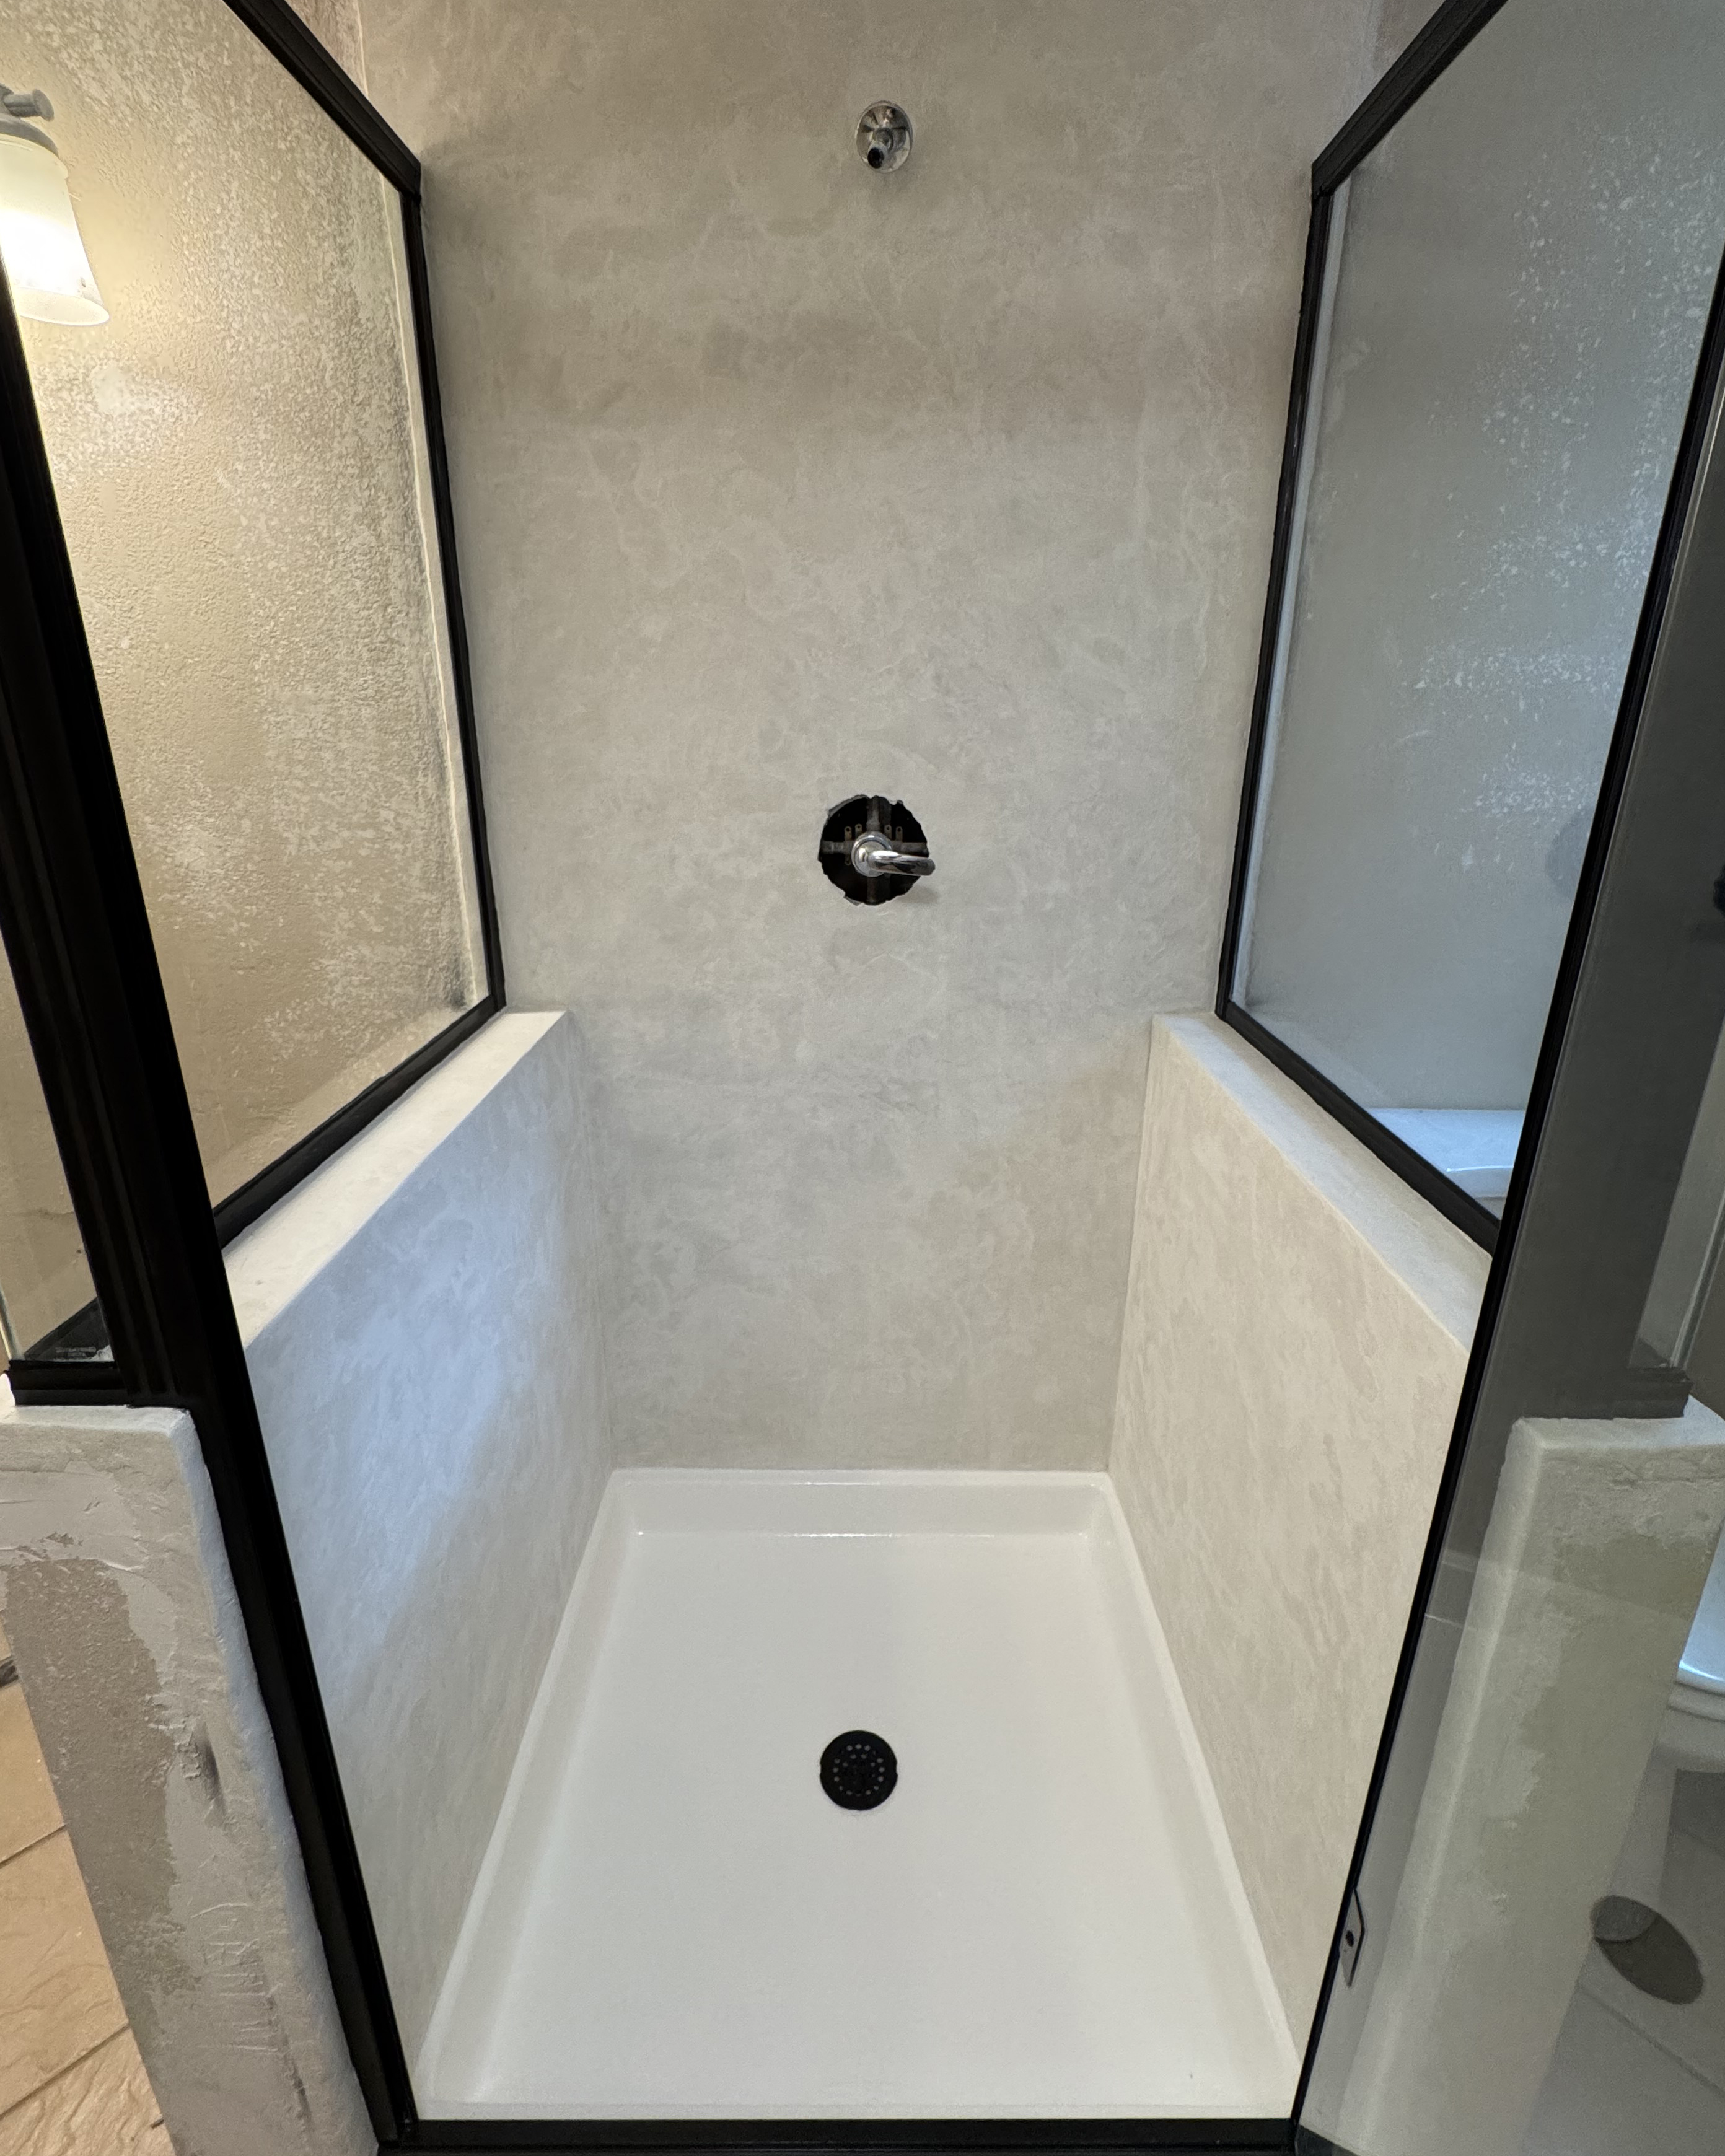
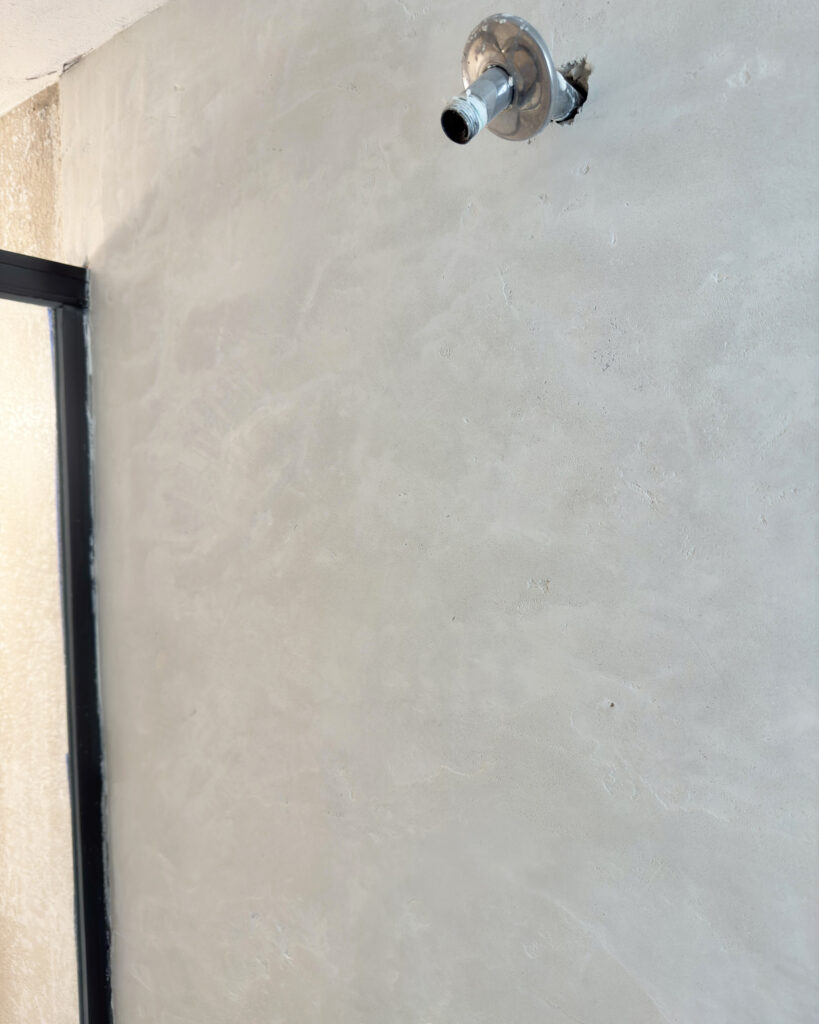
Once I was satisfied with the look of the microcement, I wiped off any remaining dust from sanding using a rag and then sealed it using a small roller and the PU sealer that came with the kit using two coats. The sealer waterproofs and protect the product, an important step especially when using in a wet area!
In addition to the microcement, I spray painted the shower frame, used an epoxy tub paint on the shower pan and replaced the hardware to give it a total refresh since it was all looking pretty rough. This shower was totally transformed and I couldn’t be more happy with how it turned out!
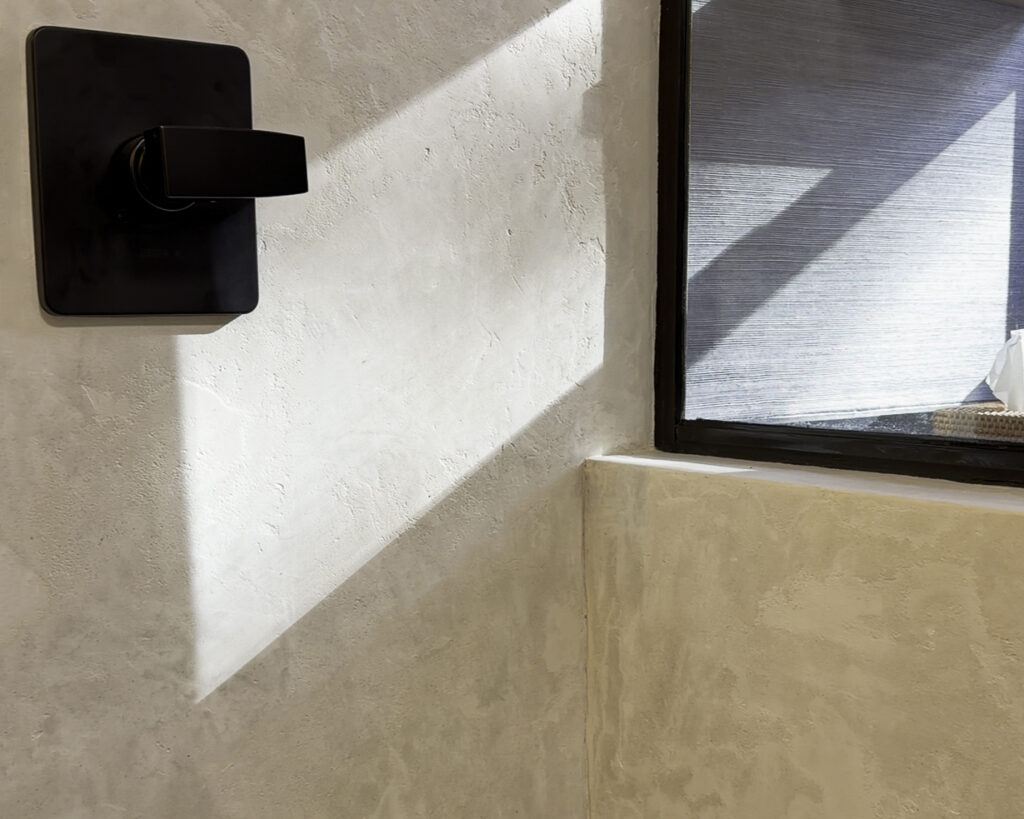
The After
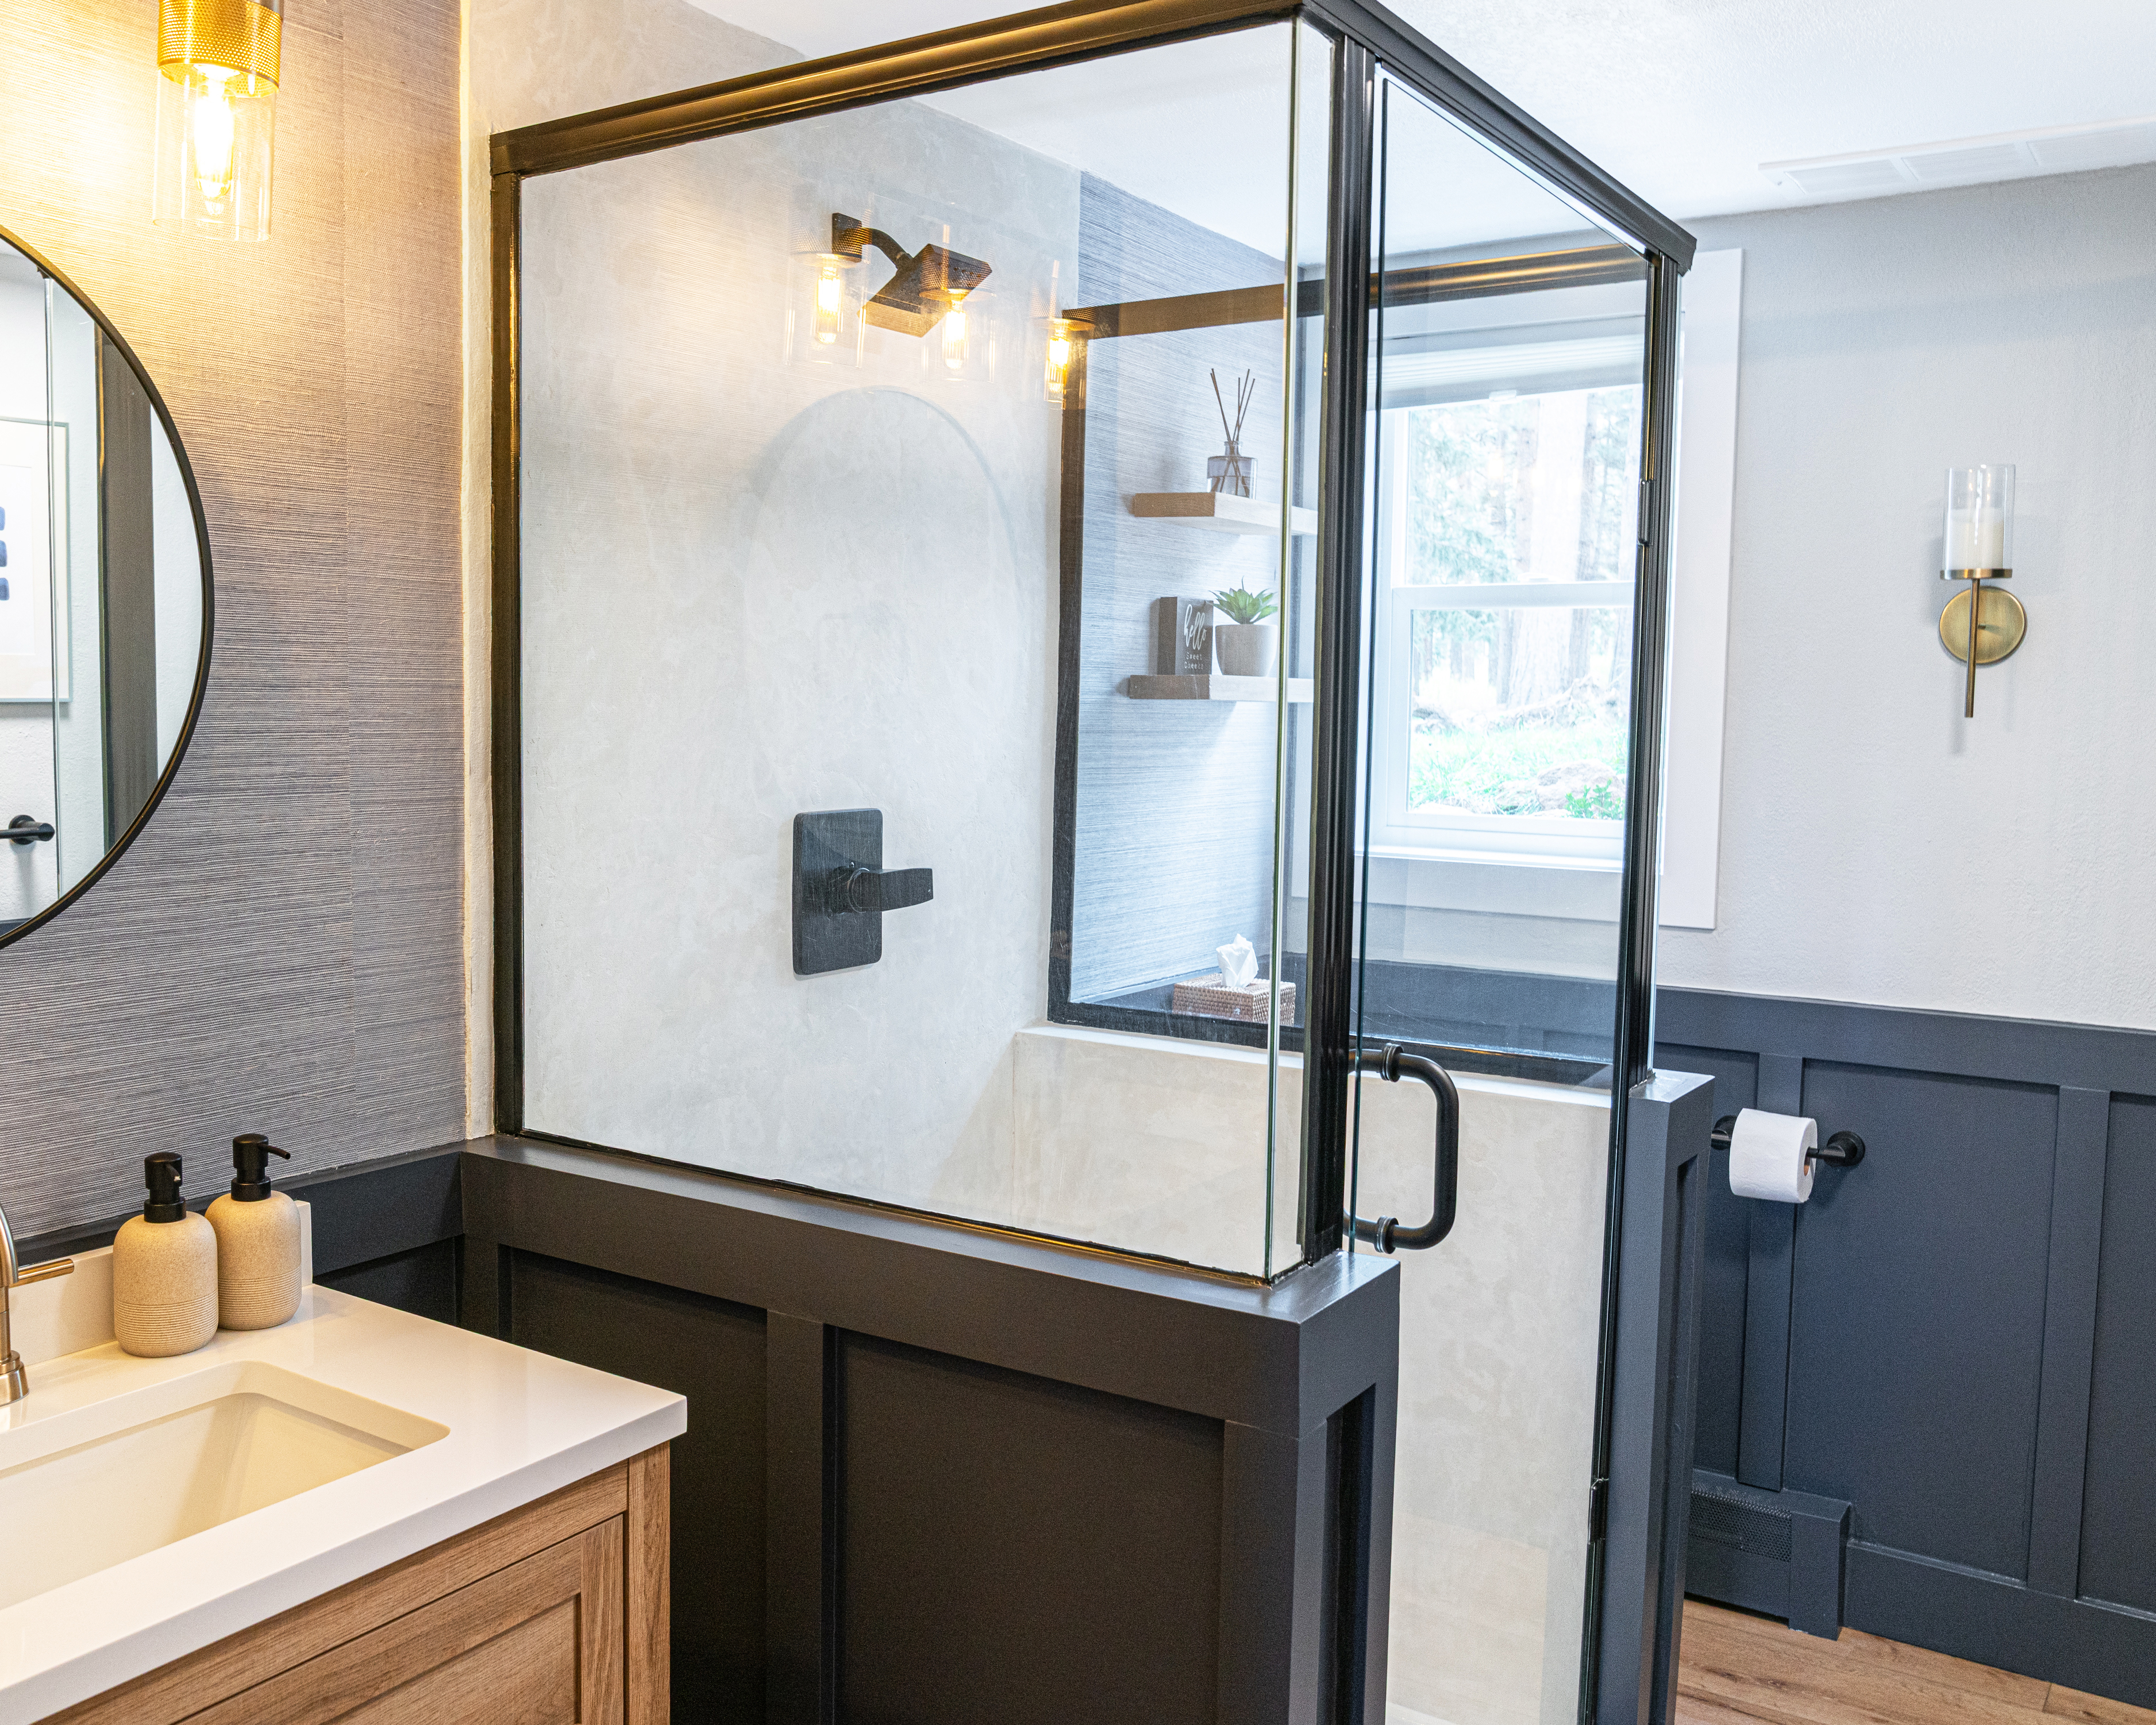
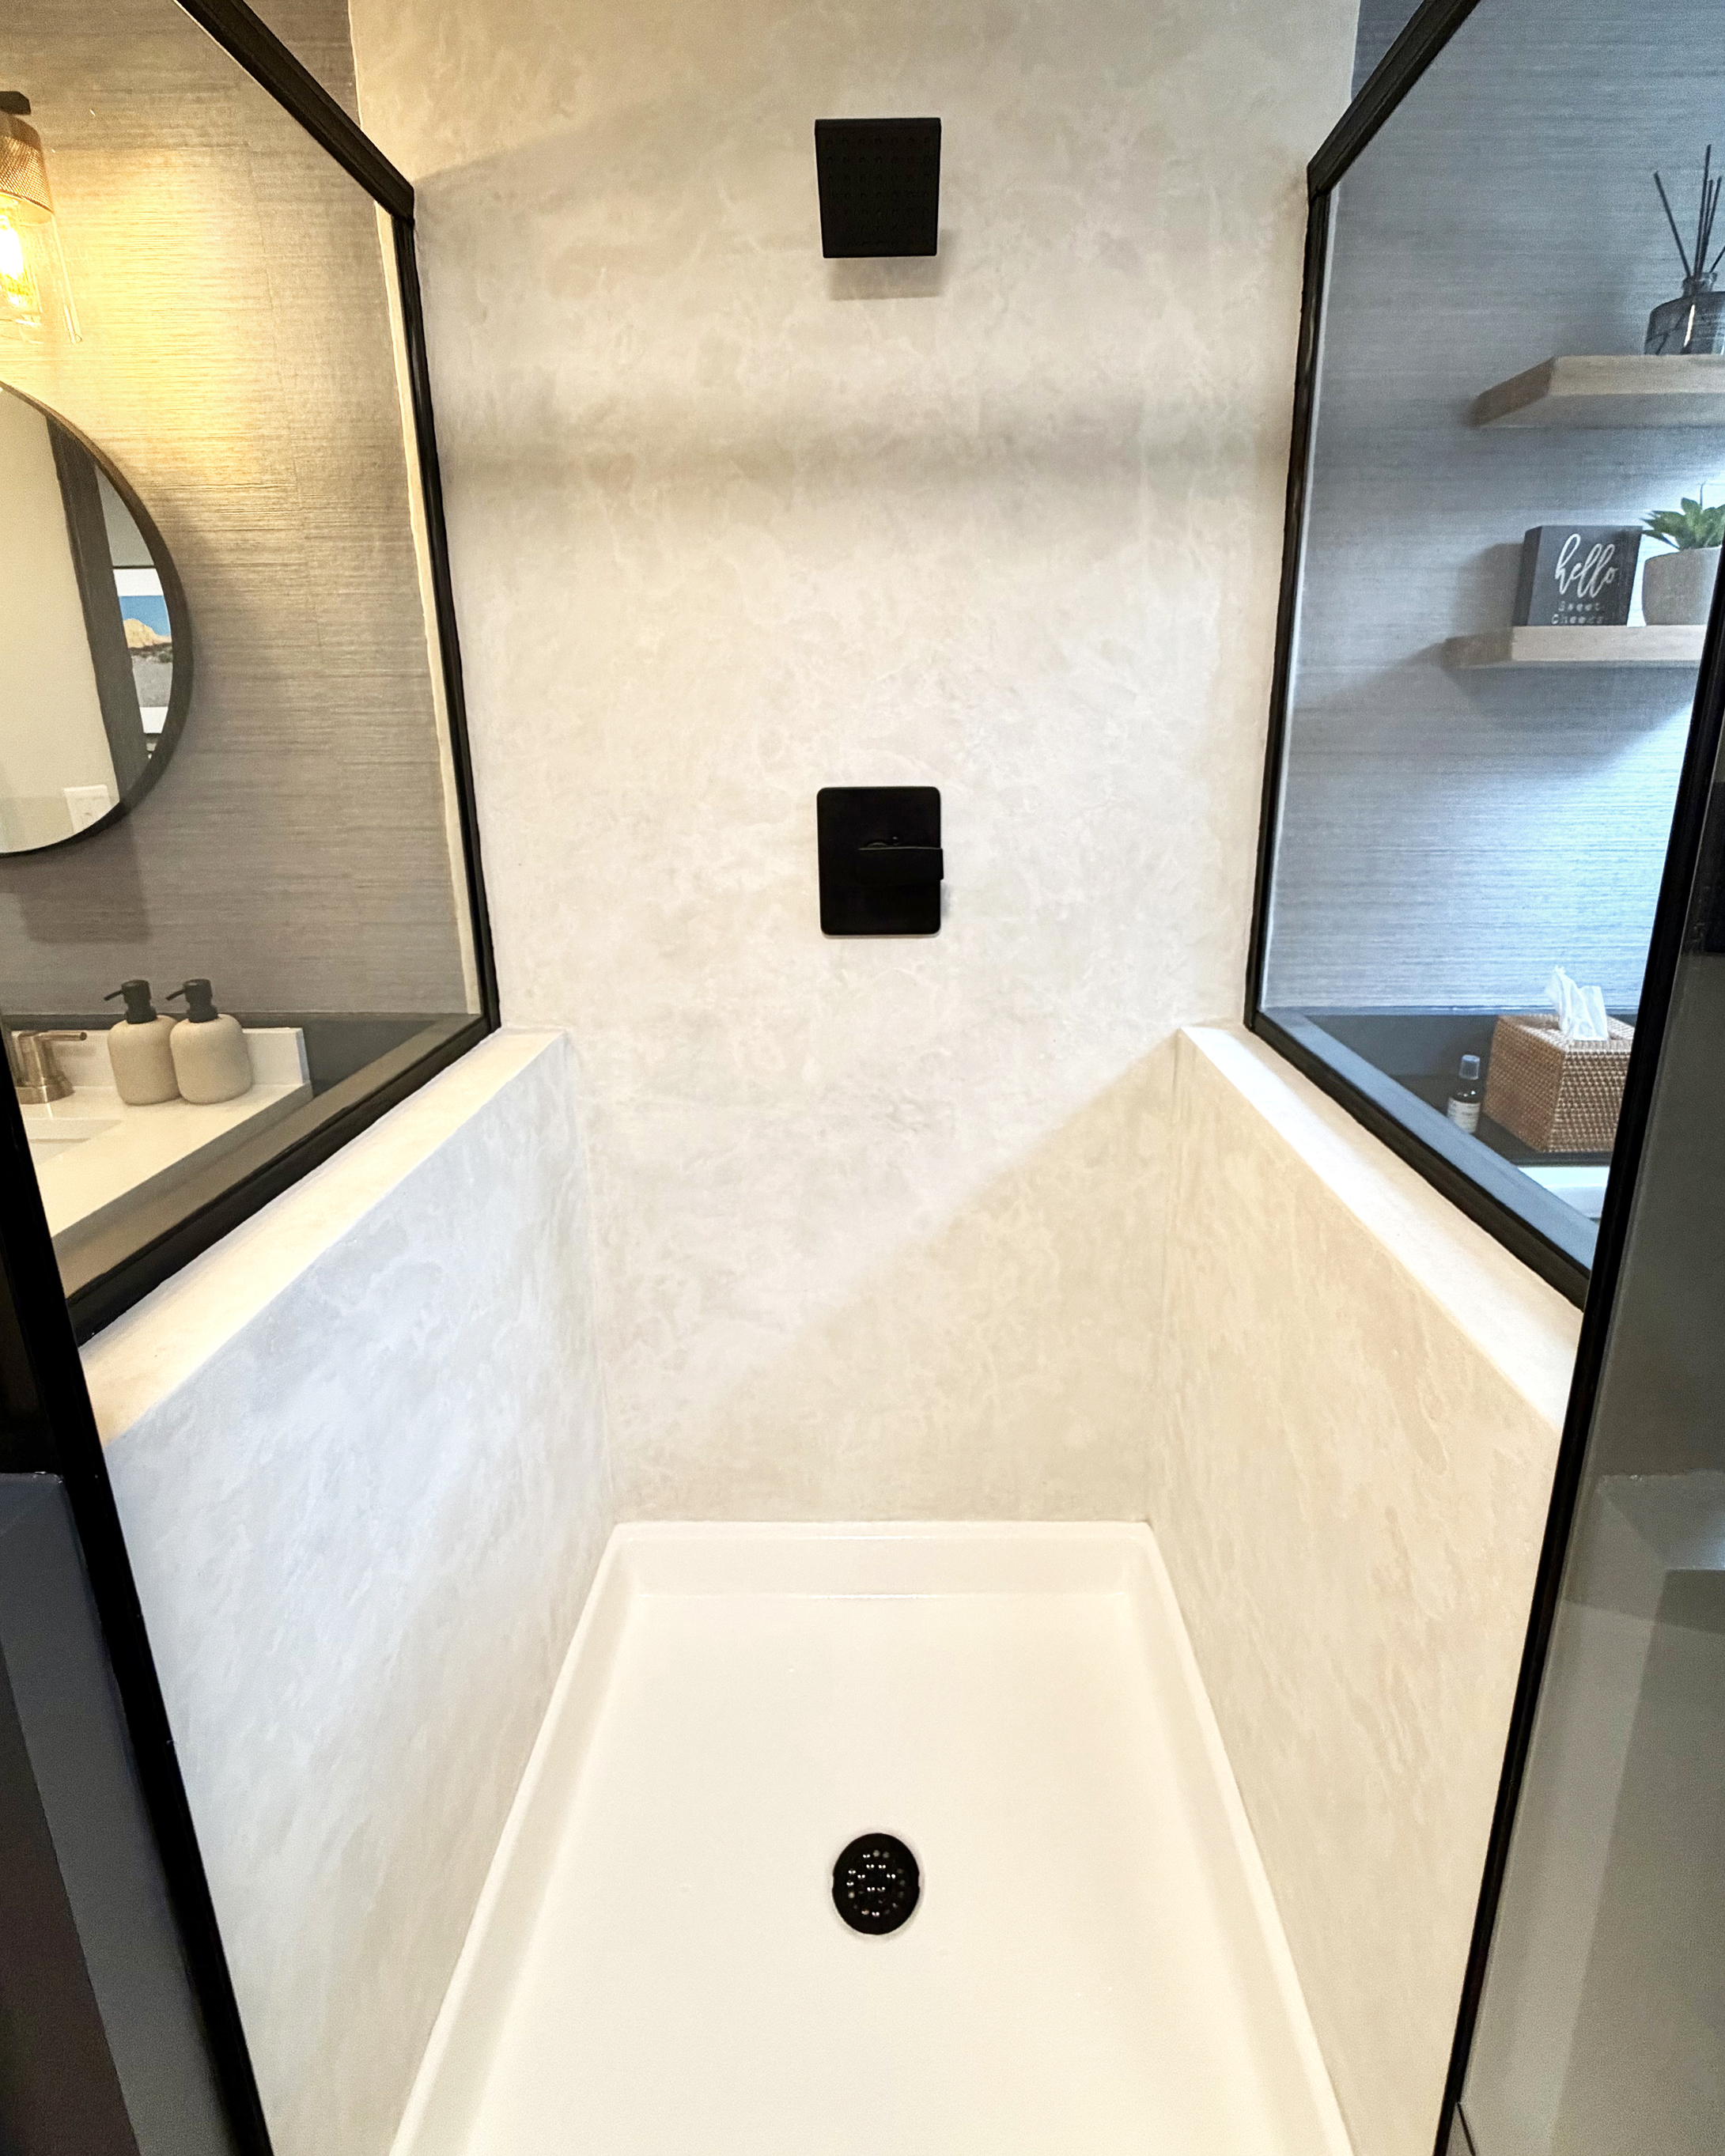
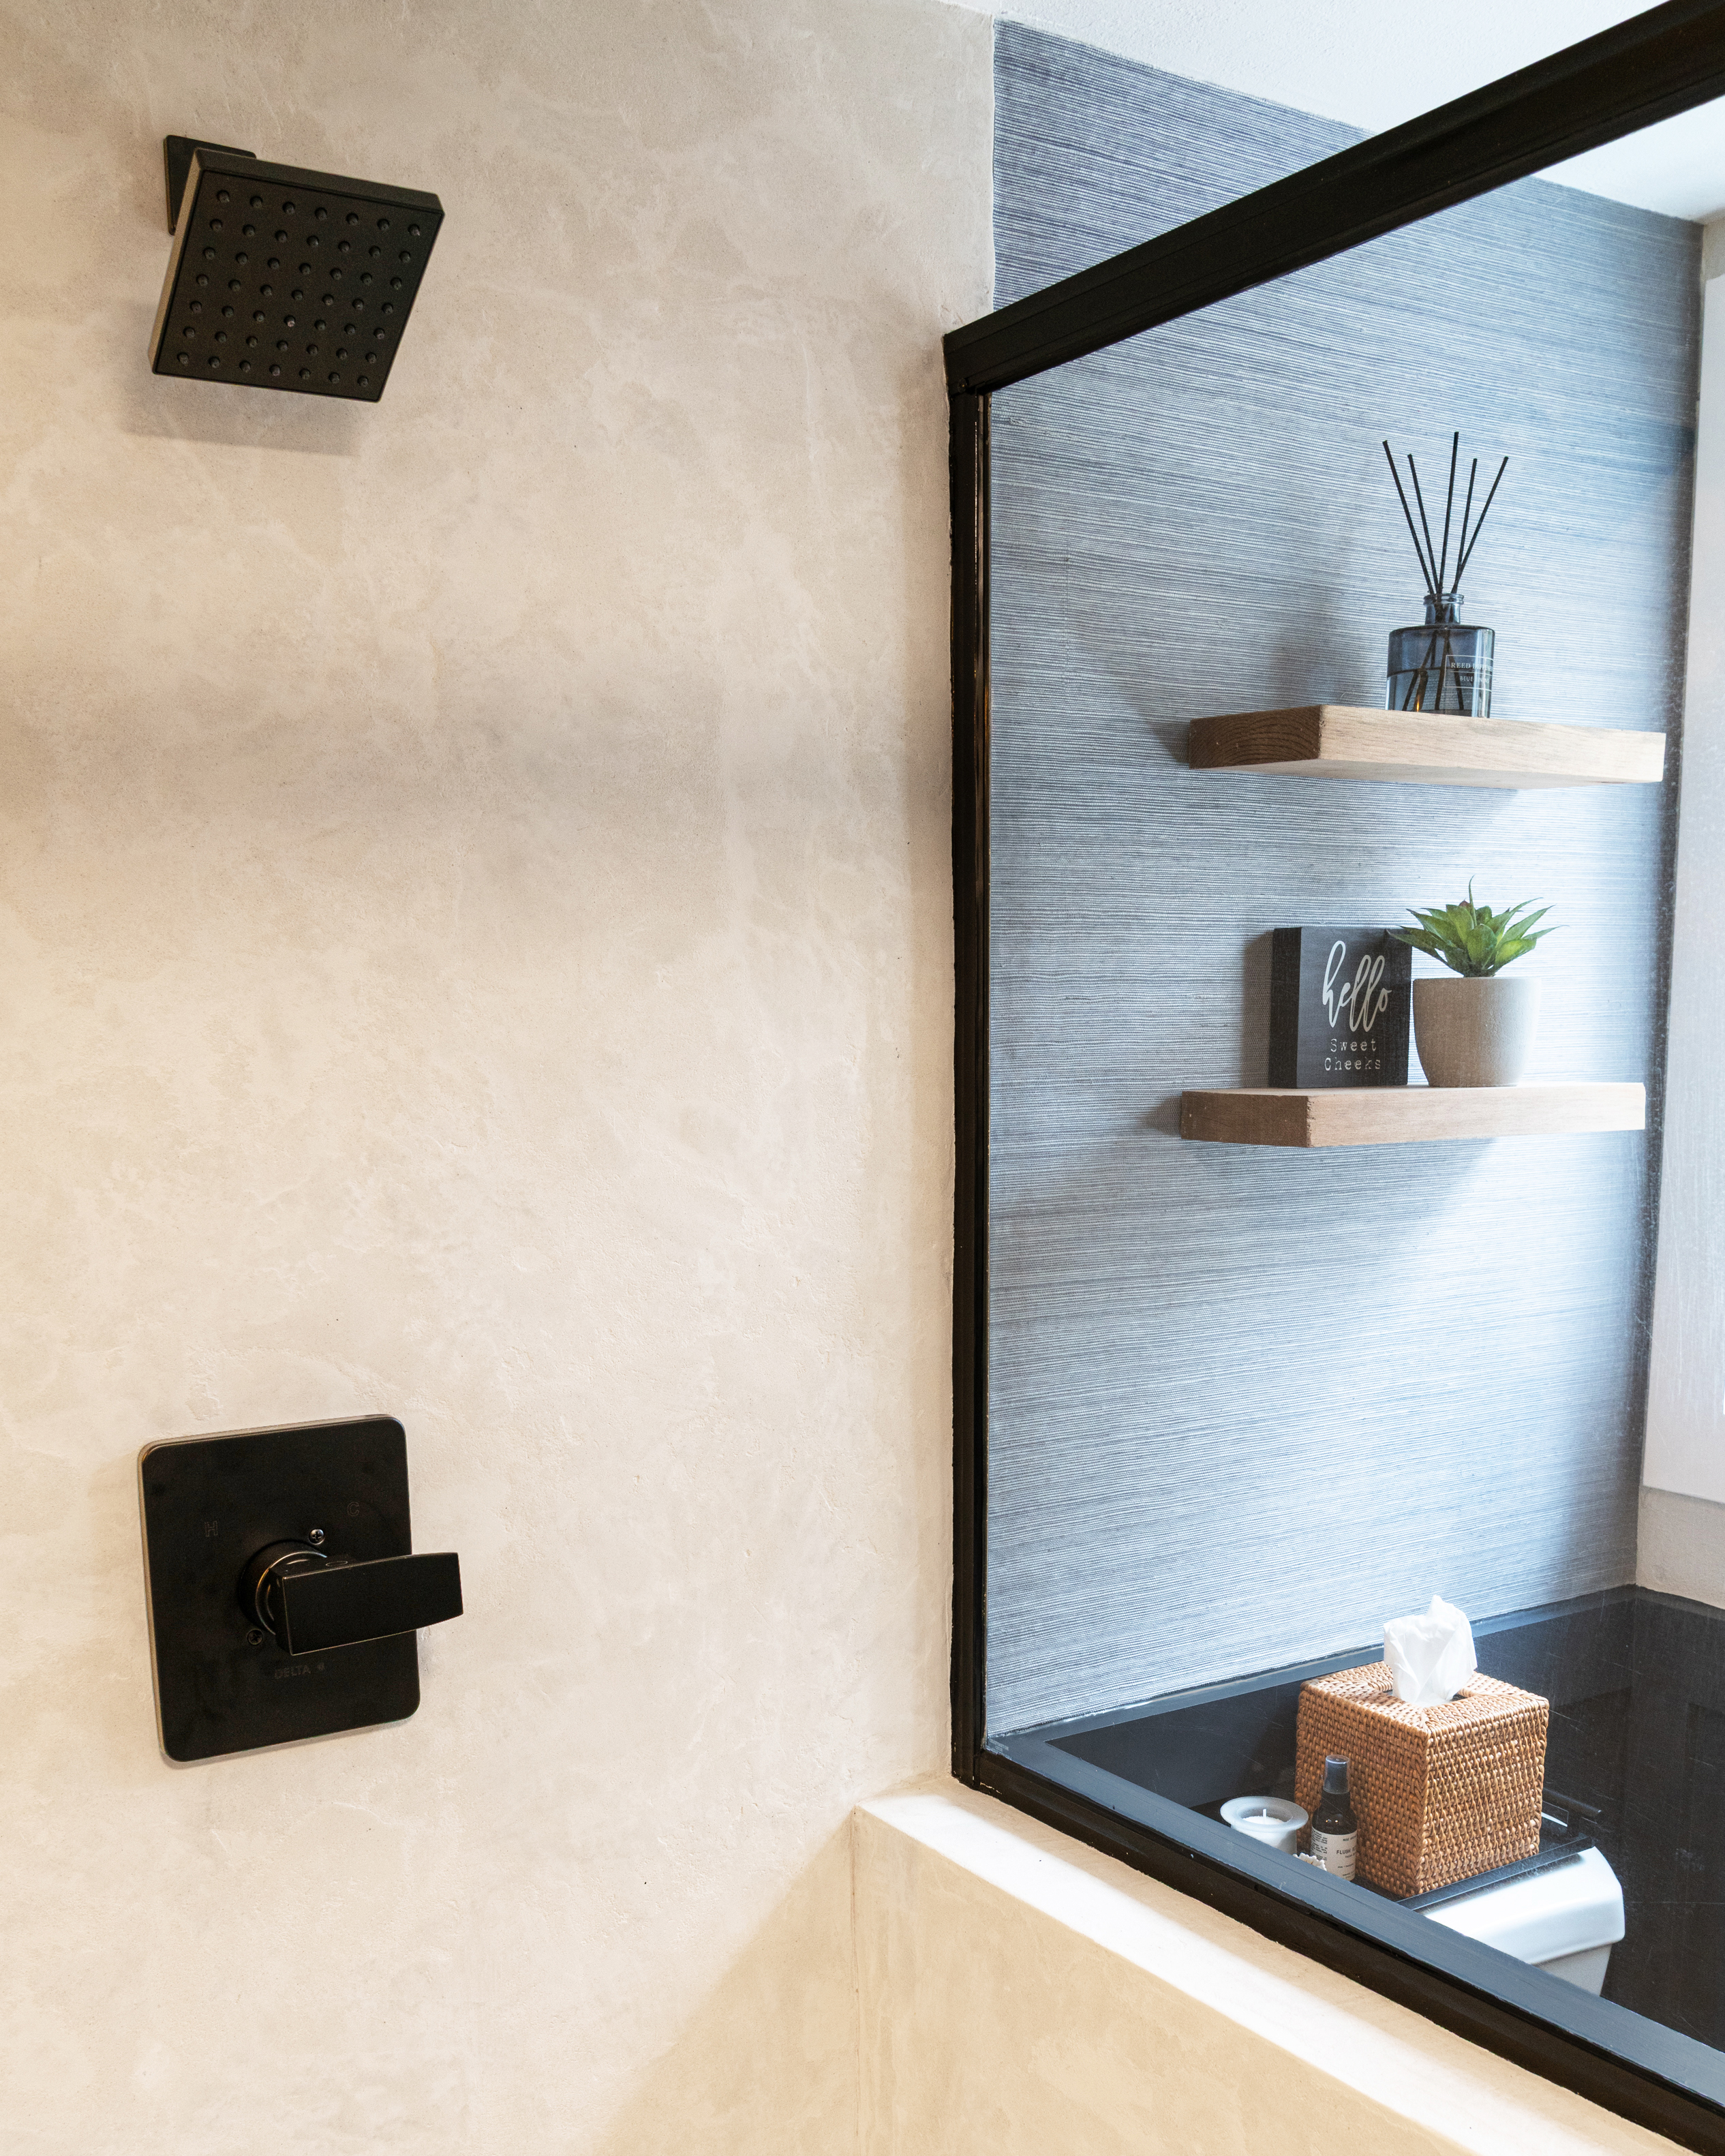
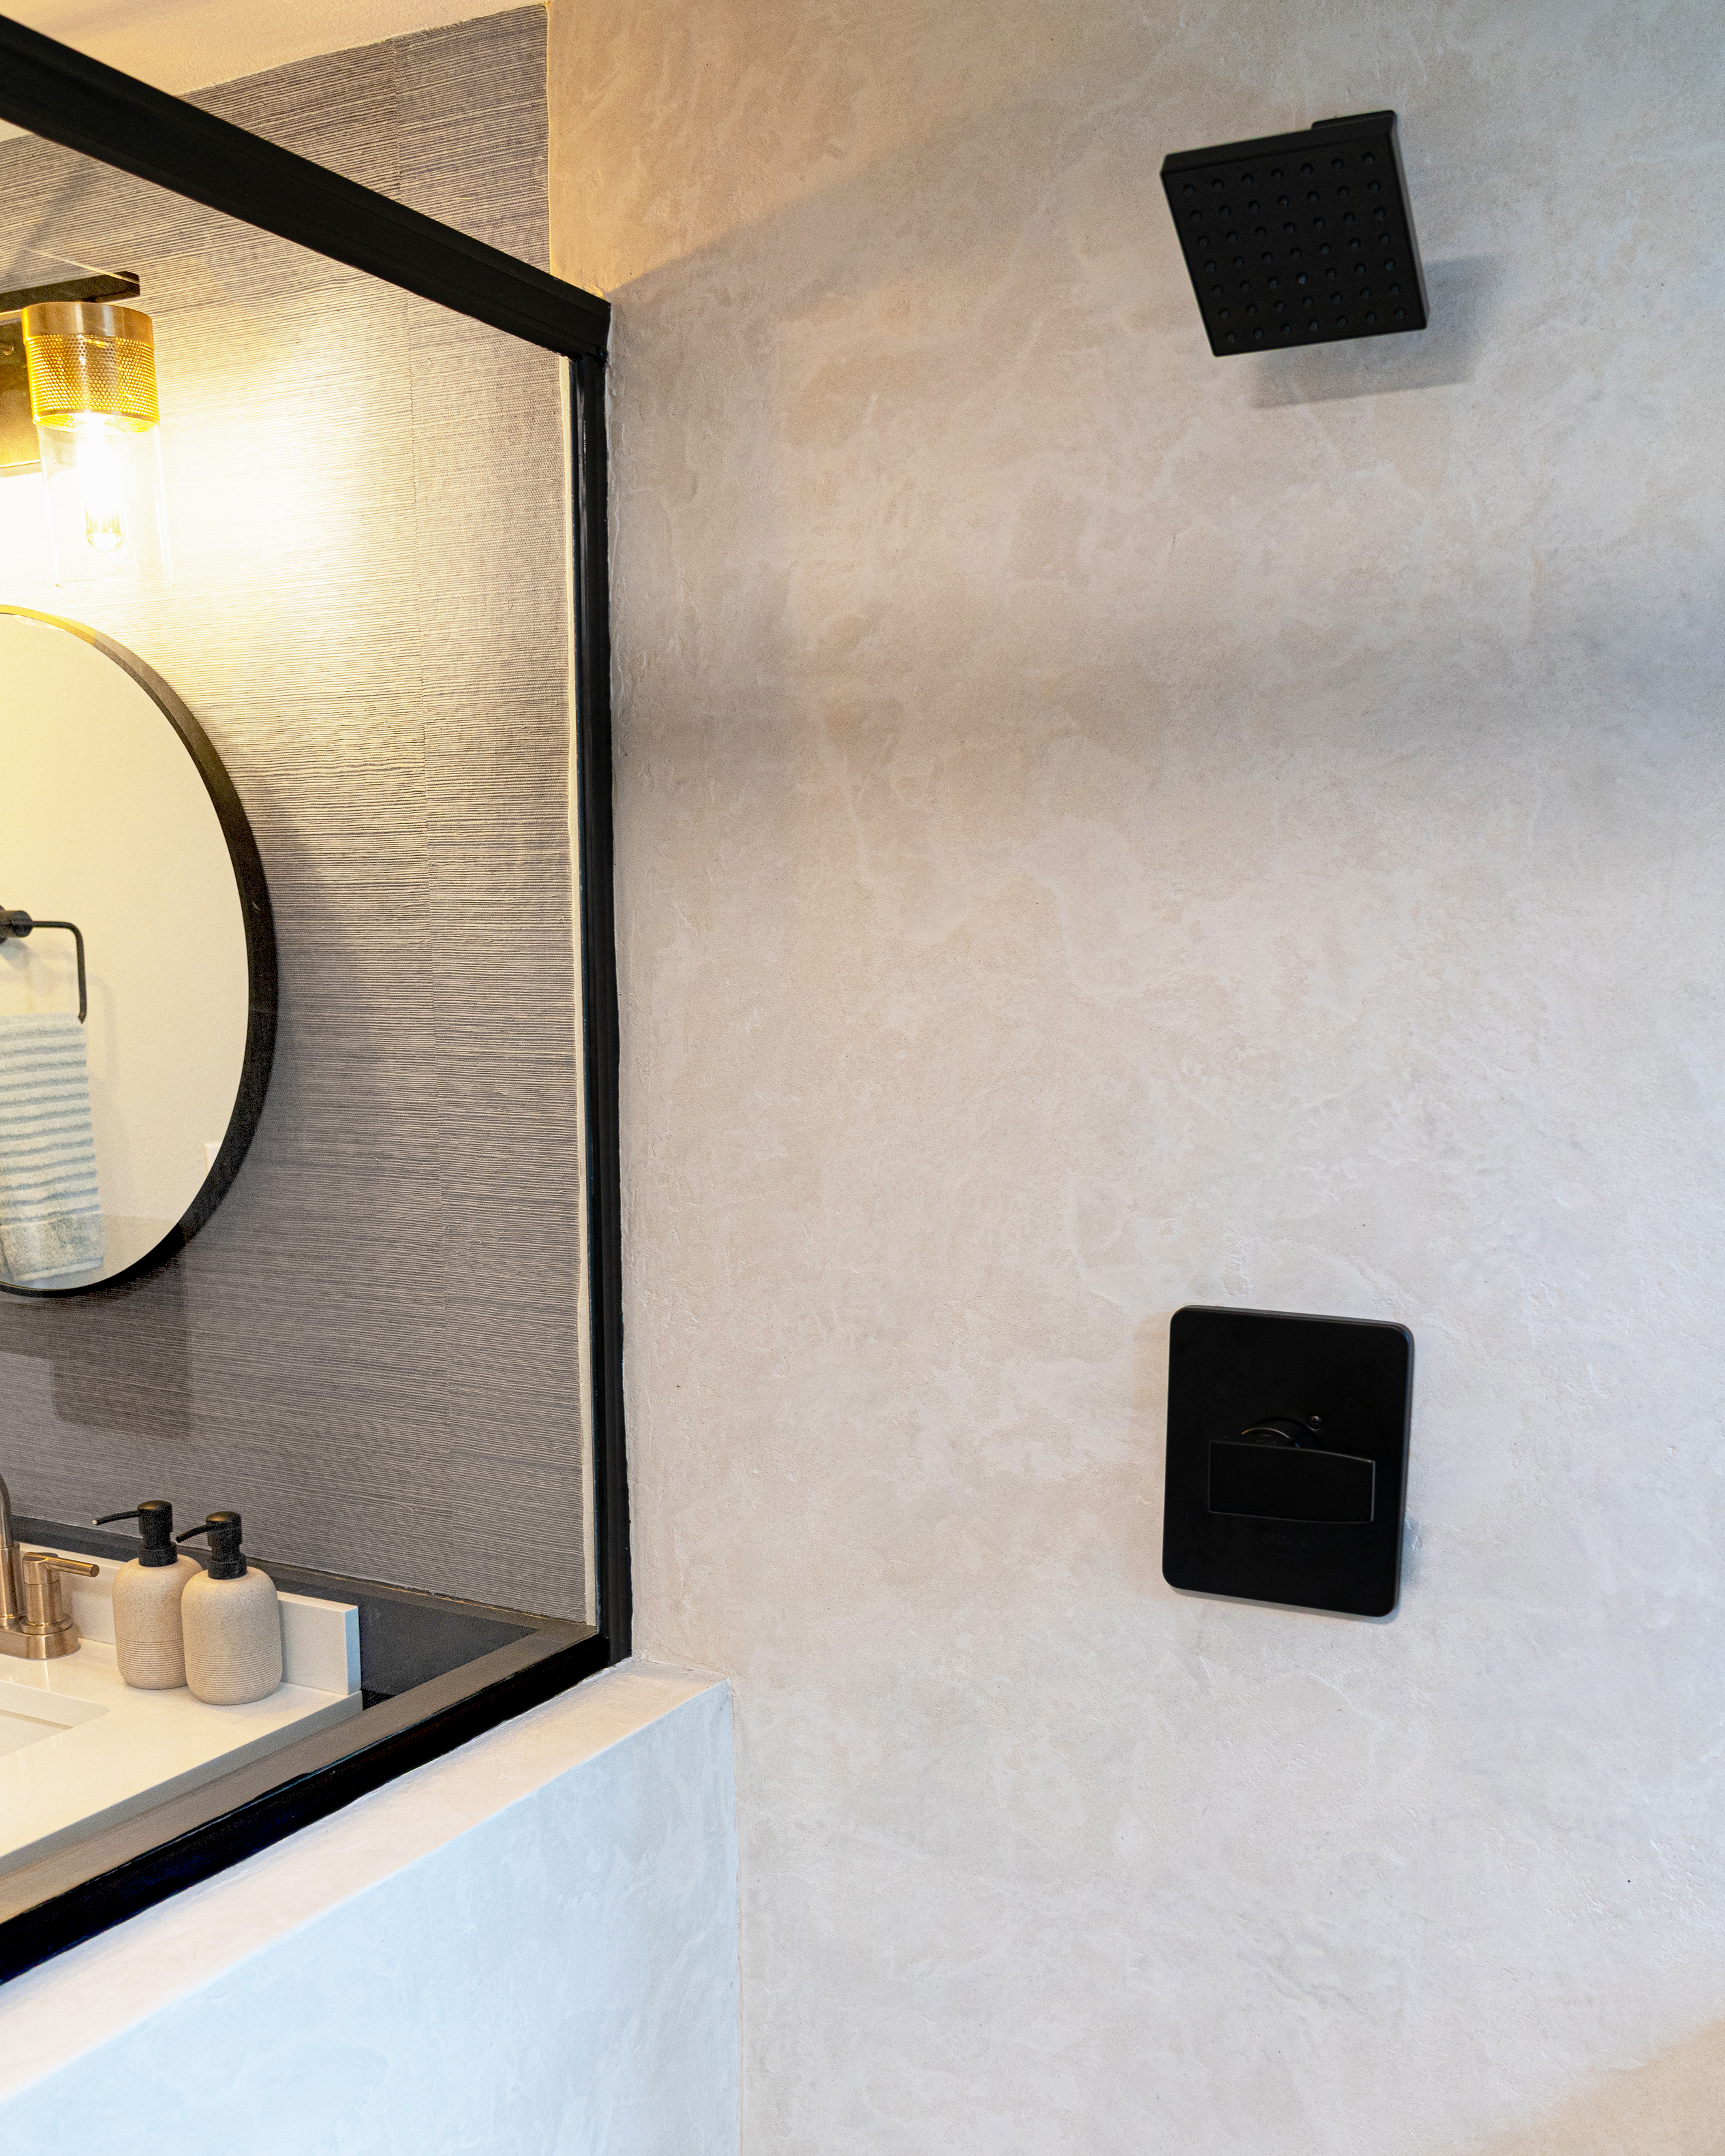
I’m still shocked at the results of this project. You would never know there was ugly tile underneath there! This was a great option that gave me a budget friendly shower refresh without spending a lot of money, time and energy in retiling the whole shower.
Materials I Used:
- Epodex Microcement (Tile kit in traffic white)
- Hand trowel
- 5 gal bucket
- Paddle mixer drill attachment
- Orbital sander
- Detail sander
- 60 & 120 grit sandpaper
- Small paint roller
- Scale
- Rustoleum epoxy tub paint
- Hardware
*This post may contain affiliate links. If you click on a link and make a purchase, I may receive a commission at no extra cost to you
Thanks for your support and following along in this project! I hope you found it useful or it sparked some inspiration in your own home.
Cheers,